> ## Documentation Index
> Fetch the complete documentation index at: https://docs.claimr.io/llms.txt
> Use this file to discover all available pages before exploring further.
# Gift codes
> Create and manage gift code lists, then distribute them as rewards for completing tasks, quests, or campaigns.
## Benefits of using gift codes
Import and manage your own gift codes to distribute to users as rewards for completing tasks, quests, or participating in your campaigns.
* **Unique codes**: Each gift code should be unique and can only be used once.
* **Security**: Ensure that your gift codes are securely stored and managed to prevent unauthorized access or misuse.
* **Tracking**: Claimr tracks which user received each gift code, allowing you to monitor distribution and usage.
## Creating a gift code list
Navigate to the **Events** section in the Claimr admin panel and select the **Gift Codes** tab.
Click **Create** to set a new list of gift codes.
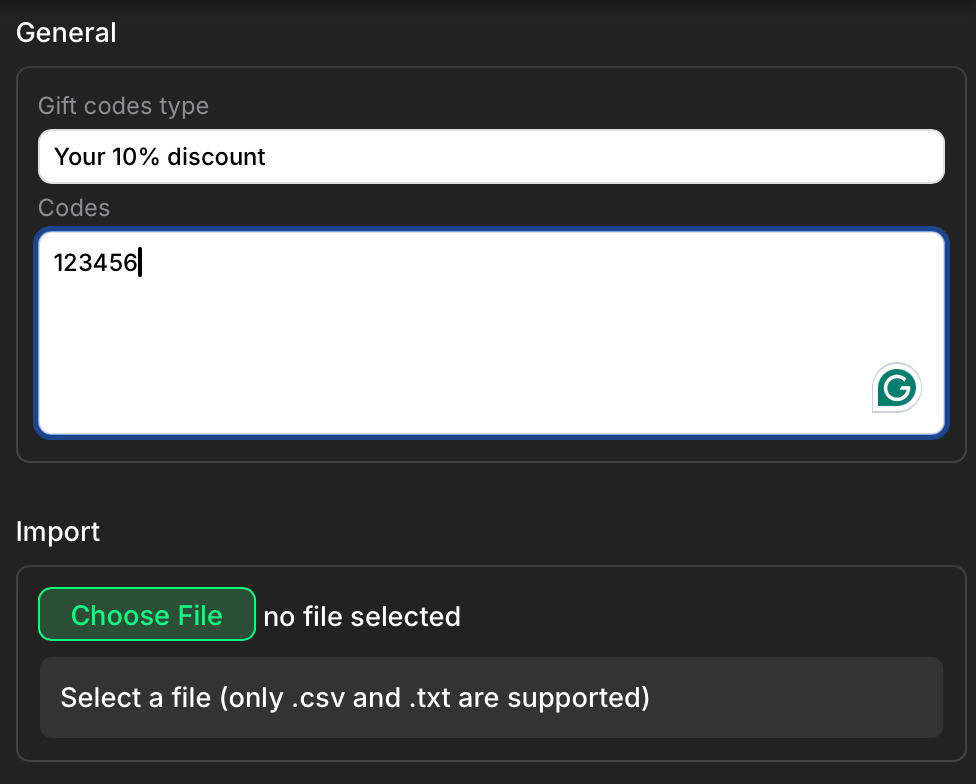 * **Gift codes type**: Provide a descriptive name or category for the type of gift codes you're adding (e.g., "10% Discount," "Free Trial").
* **Codes**: Enter the gift codes you want to include in the list. You can manually enter each code or import them from a CSV or TXT file.
Click the **Create** button to save the new gift code list.
### Managing gift codes
* **Gift codes type**: Provide a descriptive name or category for the type of gift codes you're adding (e.g., "10% Discount," "Free Trial").
* **Codes**: Enter the gift codes you want to include in the list. You can manually enter each code or import them from a CSV or TXT file.
Click the **Create** button to save the new gift code list.
### Managing gift codes
 Claimr provides a table in the Gift Codes section to manage your gift code lists. This table includes information such as:
* **Code**: The actual gift code.
* **Type**: The type or category of the gift code.
* **Date**: The date and time the gift code was added.
* **Owner**: The user who owns or is associated with the gift code.
You can use the buttons above the table to:
* **Export .csv file**: Export the list of gift codes as a CSV file.
* **Delete**: Delete selected gift code lists.
## Distributing gift codes
To distribute gift codes to users, you need to configure them as rewards within your Claimr campaign.
Go to the **Rewards** section in your campaign settings.
Click the **Create Reward** button.
Choose **Gift Code** as the reward type.
Select the specific gift code list you want to use for this reward.
Set the reward name, quantity, and any other relevant settings.
Click the **Create** button to save the new reward.
Now, when users earn this reward, they will receive a gift code from your list.
Claimr provides a table in the Gift Codes section to manage your gift code lists. This table includes information such as:
* **Code**: The actual gift code.
* **Type**: The type or category of the gift code.
* **Date**: The date and time the gift code was added.
* **Owner**: The user who owns or is associated with the gift code.
You can use the buttons above the table to:
* **Export .csv file**: Export the list of gift codes as a CSV file.
* **Delete**: Delete selected gift code lists.
## Distributing gift codes
To distribute gift codes to users, you need to configure them as rewards within your Claimr campaign.
Go to the **Rewards** section in your campaign settings.
Click the **Create Reward** button.
Choose **Gift Code** as the reward type.
Select the specific gift code list you want to use for this reward.
Set the reward name, quantity, and any other relevant settings.
Click the **Create** button to save the new reward.
Now, when users earn this reward, they will receive a gift code from your list.