> ## Documentation Index
> Fetch the complete documentation index at: https://docs.claimr.io/llms.txt
> Use this file to discover all available pages before exploring further.
# Build a campaign with Puzzle rewards
> Build a campaign that uses Puzzle rewards, from puzzle piece reward creation to task logic and final answer validation.
Puzzle rewards are collectible pieces that users earn by completing tasks throughout a quest. They're used to create multi-step challenges or quests where users gather multiple puzzle pieces and then solve a final task based on the clues they've collected.
Puzzle rewards help structure narrative or logic-based progression within any campaign. They encourage users to:
* Complete more tasks to collect all puzzle pieces.
* Pay attention to detail in clues or visuals.
* Solve a final challenge to validate their understanding.
* Stay engaged through multi-step discovery.
This tutorial walks through building a campaign that uses Puzzle rewards, from reward creation to task logic and the final answer validation.
## Create your campaign
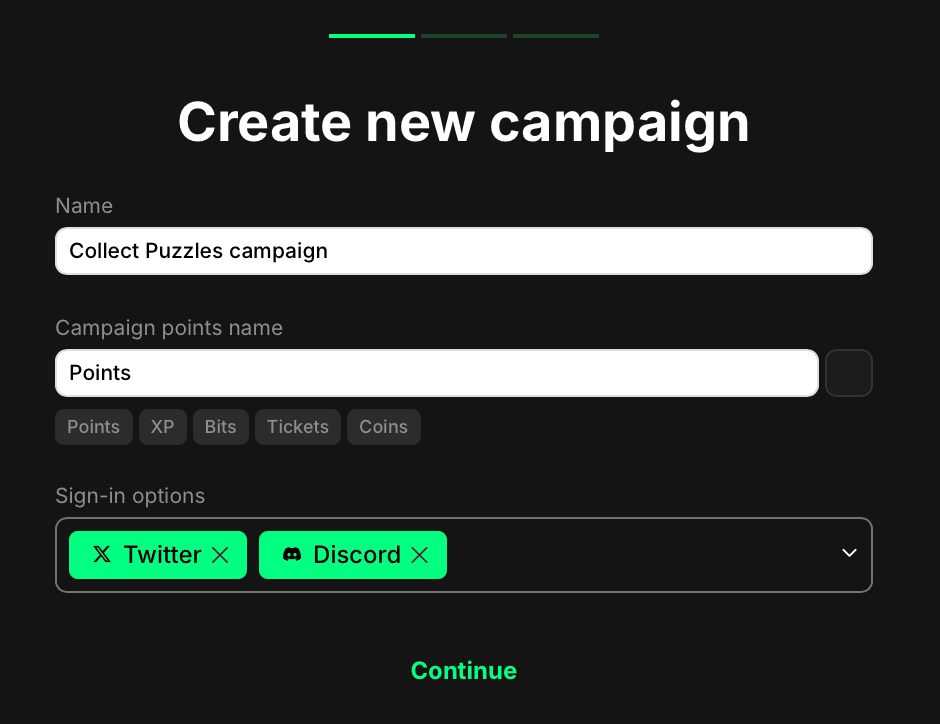 From your Claimr dashboard:
1. Click **Campaigns** in the navigation menu.
2. On the **Campaigns** page, click **Create new campaign**.
3. In the opened window, fill in the following details:
* **Name:** Enter a name for your campaign.
* **Campaign points name:** Enter the label for points users will earn (e.g., Points, Tokens).
* **Sign-in options:** Choose any supported sign-in method, depending on your audience.
4. Click **Continue**, then select **Empty**.
5. Click **Continue**, then select your campaign's visual theme.
## Create your quest
Once your campaign is created, you'll land in the Groups of quests section:
* Rename the default group if needed by clicking the pencil icon.
* Inside that group, click **+ Create quest**.
* Enter a descriptive name for your puzzle quest (e.g., "Puzzle Quest") and click **Create**.
* Click the quest card to open its settings page.
From here, you can begin adding tasks and configuring the quest's general settings (name, image, description).
## Create puzzle piece rewards
You'll need to create one reward for each puzzle piece the user should collect.
From your Claimr dashboard:
1. Click **Campaigns** in the navigation menu.
2. On the **Campaigns** page, click **Create new campaign**.
3. In the opened window, fill in the following details:
* **Name:** Enter a name for your campaign.
* **Campaign points name:** Enter the label for points users will earn (e.g., Points, Tokens).
* **Sign-in options:** Choose any supported sign-in method, depending on your audience.
4. Click **Continue**, then select **Empty**.
5. Click **Continue**, then select your campaign's visual theme.
## Create your quest
Once your campaign is created, you'll land in the Groups of quests section:
* Rename the default group if needed by clicking the pencil icon.
* Inside that group, click **+ Create quest**.
* Enter a descriptive name for your puzzle quest (e.g., "Puzzle Quest") and click **Create**.
* Click the quest card to open its settings page.
From here, you can begin adding tasks and configuring the quest's general settings (name, image, description).
## Create puzzle piece rewards
You'll need to create one reward for each puzzle piece the user should collect.
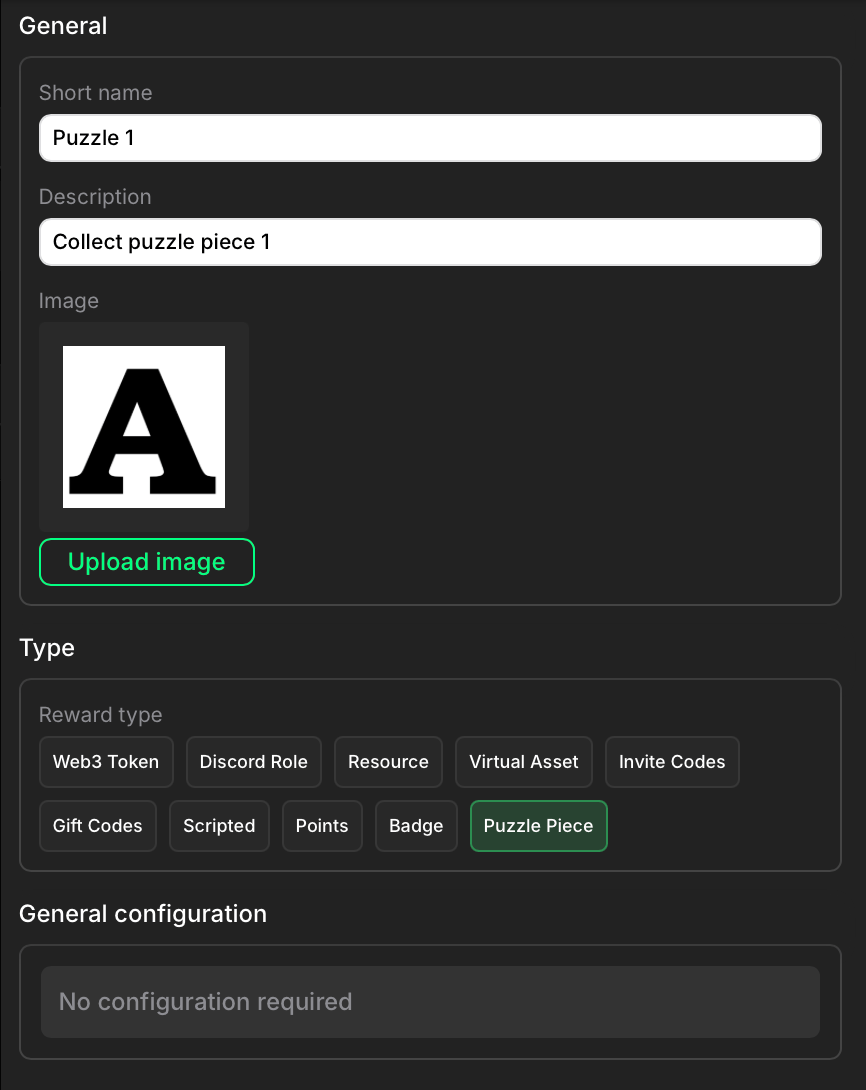 Go to the **Rewards** tab and click **Create reward**.
* **Short name:** Enter a name like "Puzzle 1", "Puzzle 2", etc.
* **Description:** Label the piece (e.g., "Puzzle Piece 1") or set the instruction for your users.
* **Image (optional):** Upload a visual clue: letter, number, or fragment of a bigger picture.
Select **Puzzle Piece** as the reward type and click **Create** to save the reward. Repeat these steps for each individual puzzle piece.
Go to the **Rewards** tab and click **Create reward**.
* **Short name:** Enter a name like "Puzzle 1", "Puzzle 2", etc.
* **Description:** Label the piece (e.g., "Puzzle Piece 1") or set the instruction for your users.
* **Image (optional):** Upload a visual clue: letter, number, or fragment of a bigger picture.
Select **Puzzle Piece** as the reward type and click **Create** to save the reward. Repeat these steps for each individual puzzle piece.
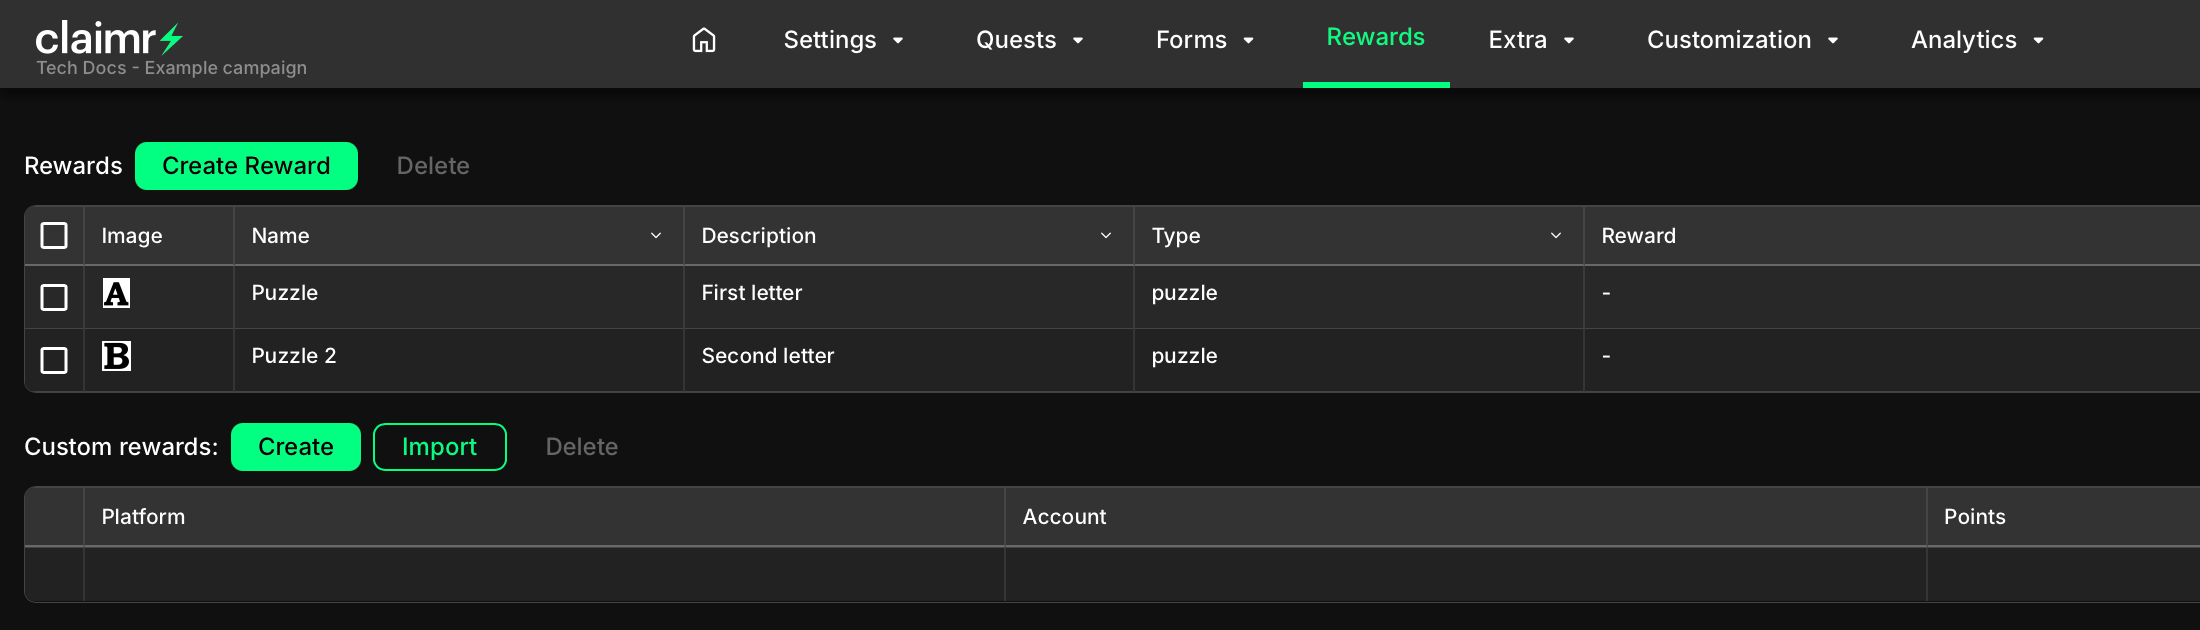 All created rewards will appear in the Rewards dashboard.
## Create your tasks
Now that your puzzle rewards are set, add tasks that distribute them to users. Each puzzle piece requires two tasks:
1. A core task (e.g., Follow on X, Subscribe to YouTube).
2. A **Claim a reward** task immediately after.
To add a task, on the quest settings page, click **+ Create new task**.
### Configure the core task
* Select a task type like Follow on X or Subscribe to a channel.
* Fill in the required fields (e.g., URL, message).
* Click **Create task** to save.
### Add a Claim a reward task
All created rewards will appear in the Rewards dashboard.
## Create your tasks
Now that your puzzle rewards are set, add tasks that distribute them to users. Each puzzle piece requires two tasks:
1. A core task (e.g., Follow on X, Subscribe to YouTube).
2. A **Claim a reward** task immediately after.
To add a task, on the quest settings page, click **+ Create new task**.
### Configure the core task
* Select a task type like Follow on X or Subscribe to a channel.
* Fill in the required fields (e.g., URL, message).
* Click **Create task** to save.
### Add a Claim a reward task
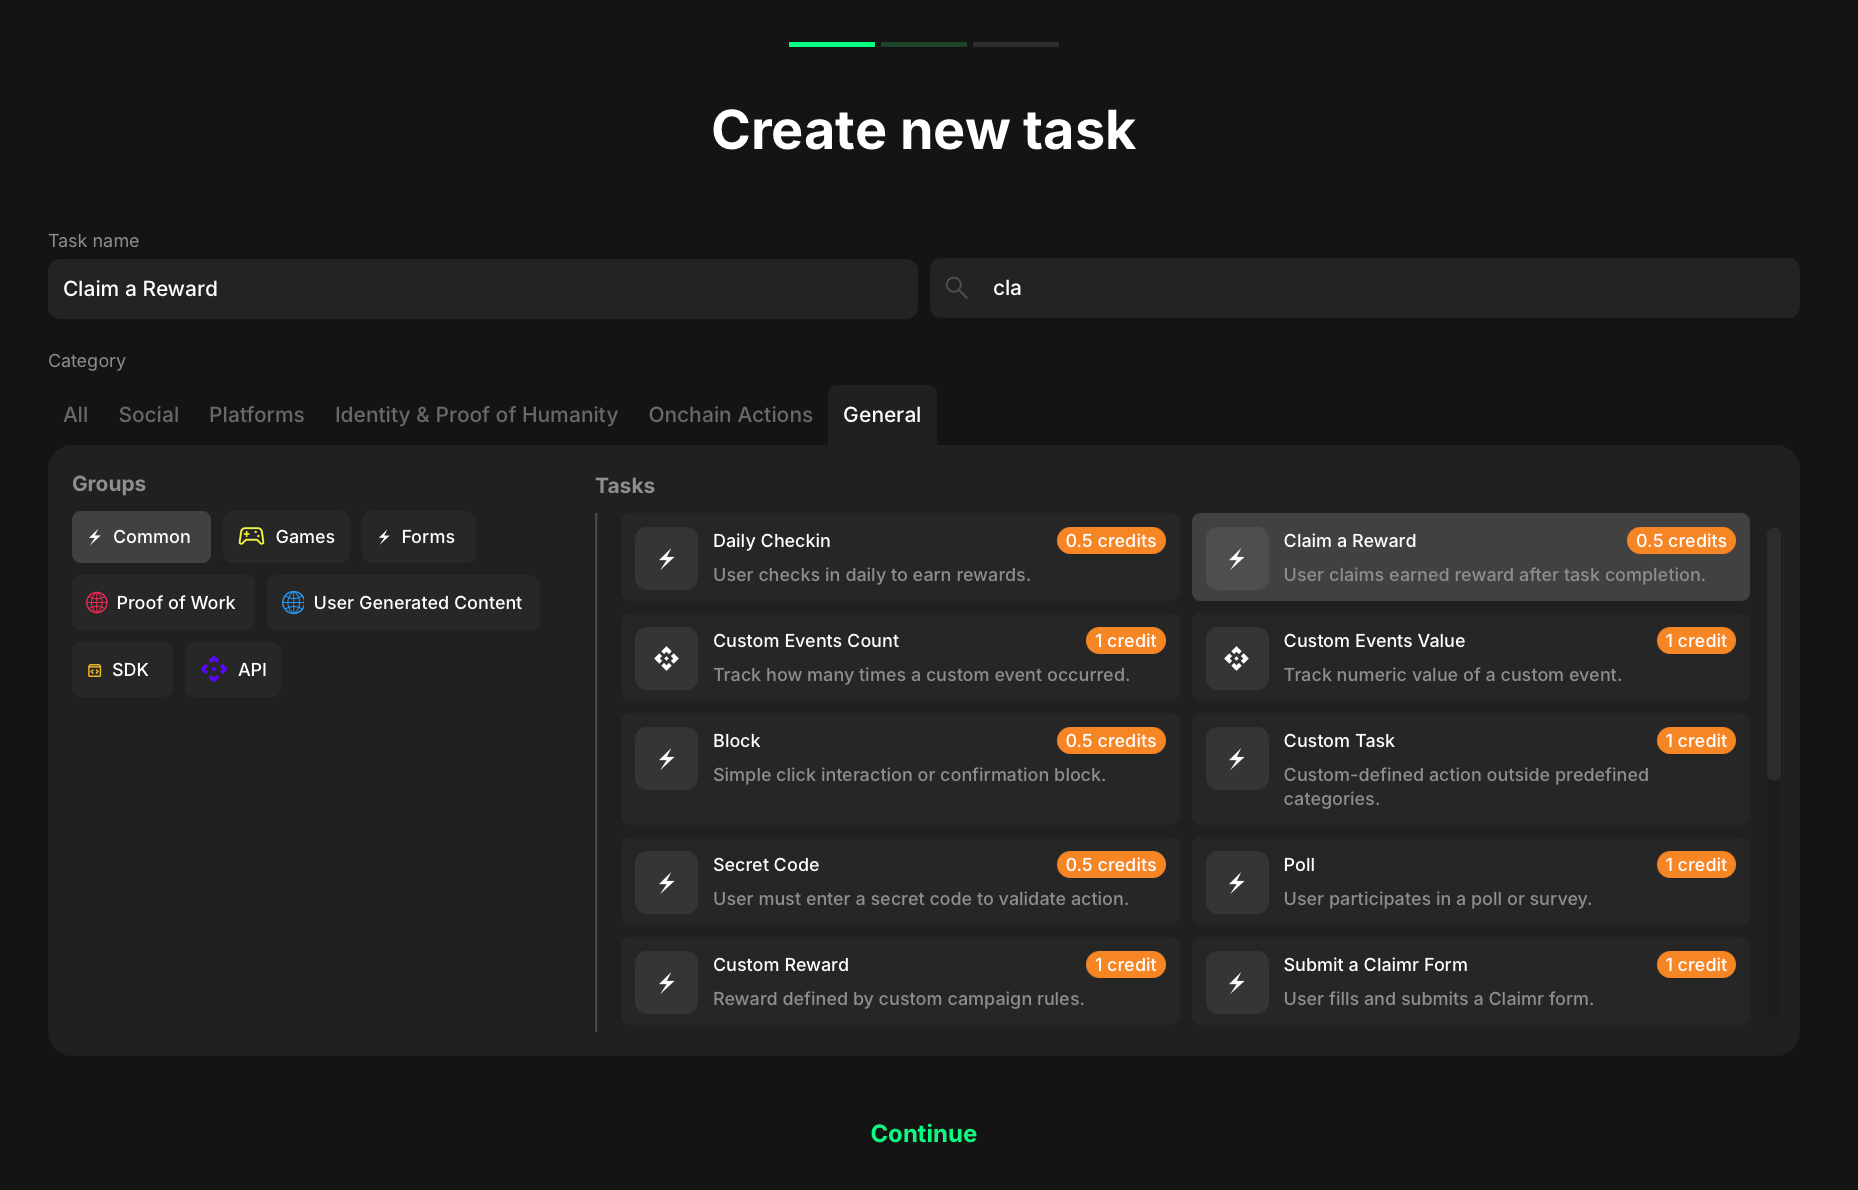 Right after the core task, add a **Claim reward** task to deliver the puzzle piece.
Click **+ Create new task**.
Under Category, select **Common**, then choose **Claim a reward** and click **Continue**.
Right after the core task, add a **Claim reward** task to deliver the puzzle piece.
Click **+ Create new task**.
Under Category, select **Common**, then choose **Claim a reward** and click **Continue**.
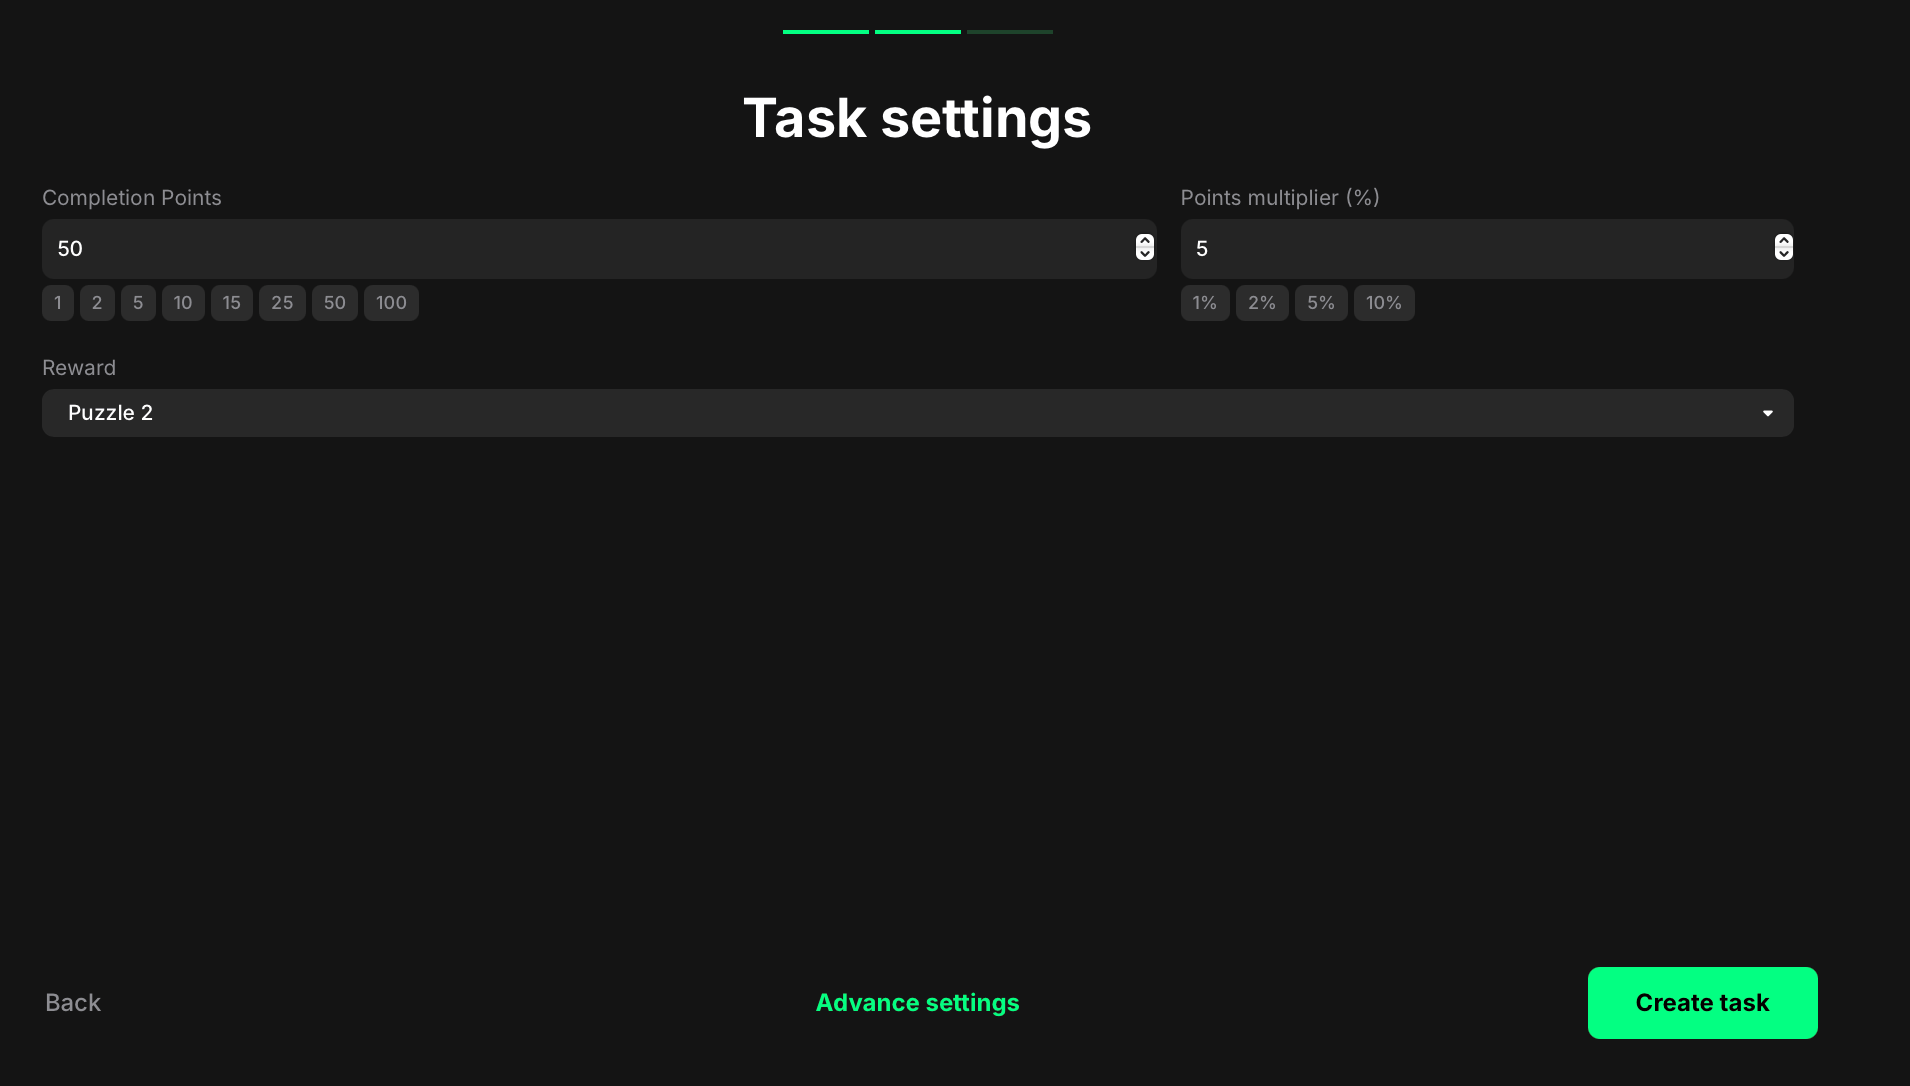 * **Completion points:** Set the base reward for claiming the piece.
* **Points multiplier (%):** Optional.
* **Reward:** Select the appropriate Puzzle Piece reward (e.g., Puzzle 1).
Click **Create task** to save.
Repeat this pair (core task + claim reward) for every puzzle piece.
## Create a final Secret code task
Once all puzzle pieces are distributed, add a final challenge that users can only complete if they've correctly interpreted the clues.
* **Completion points:** Set the base reward for claiming the piece.
* **Points multiplier (%):** Optional.
* **Reward:** Select the appropriate Puzzle Piece reward (e.g., Puzzle 1).
Click **Create task** to save.
Repeat this pair (core task + claim reward) for every puzzle piece.
## Create a final Secret code task
Once all puzzle pieces are distributed, add a final challenge that users can only complete if they've correctly interpreted the clues.
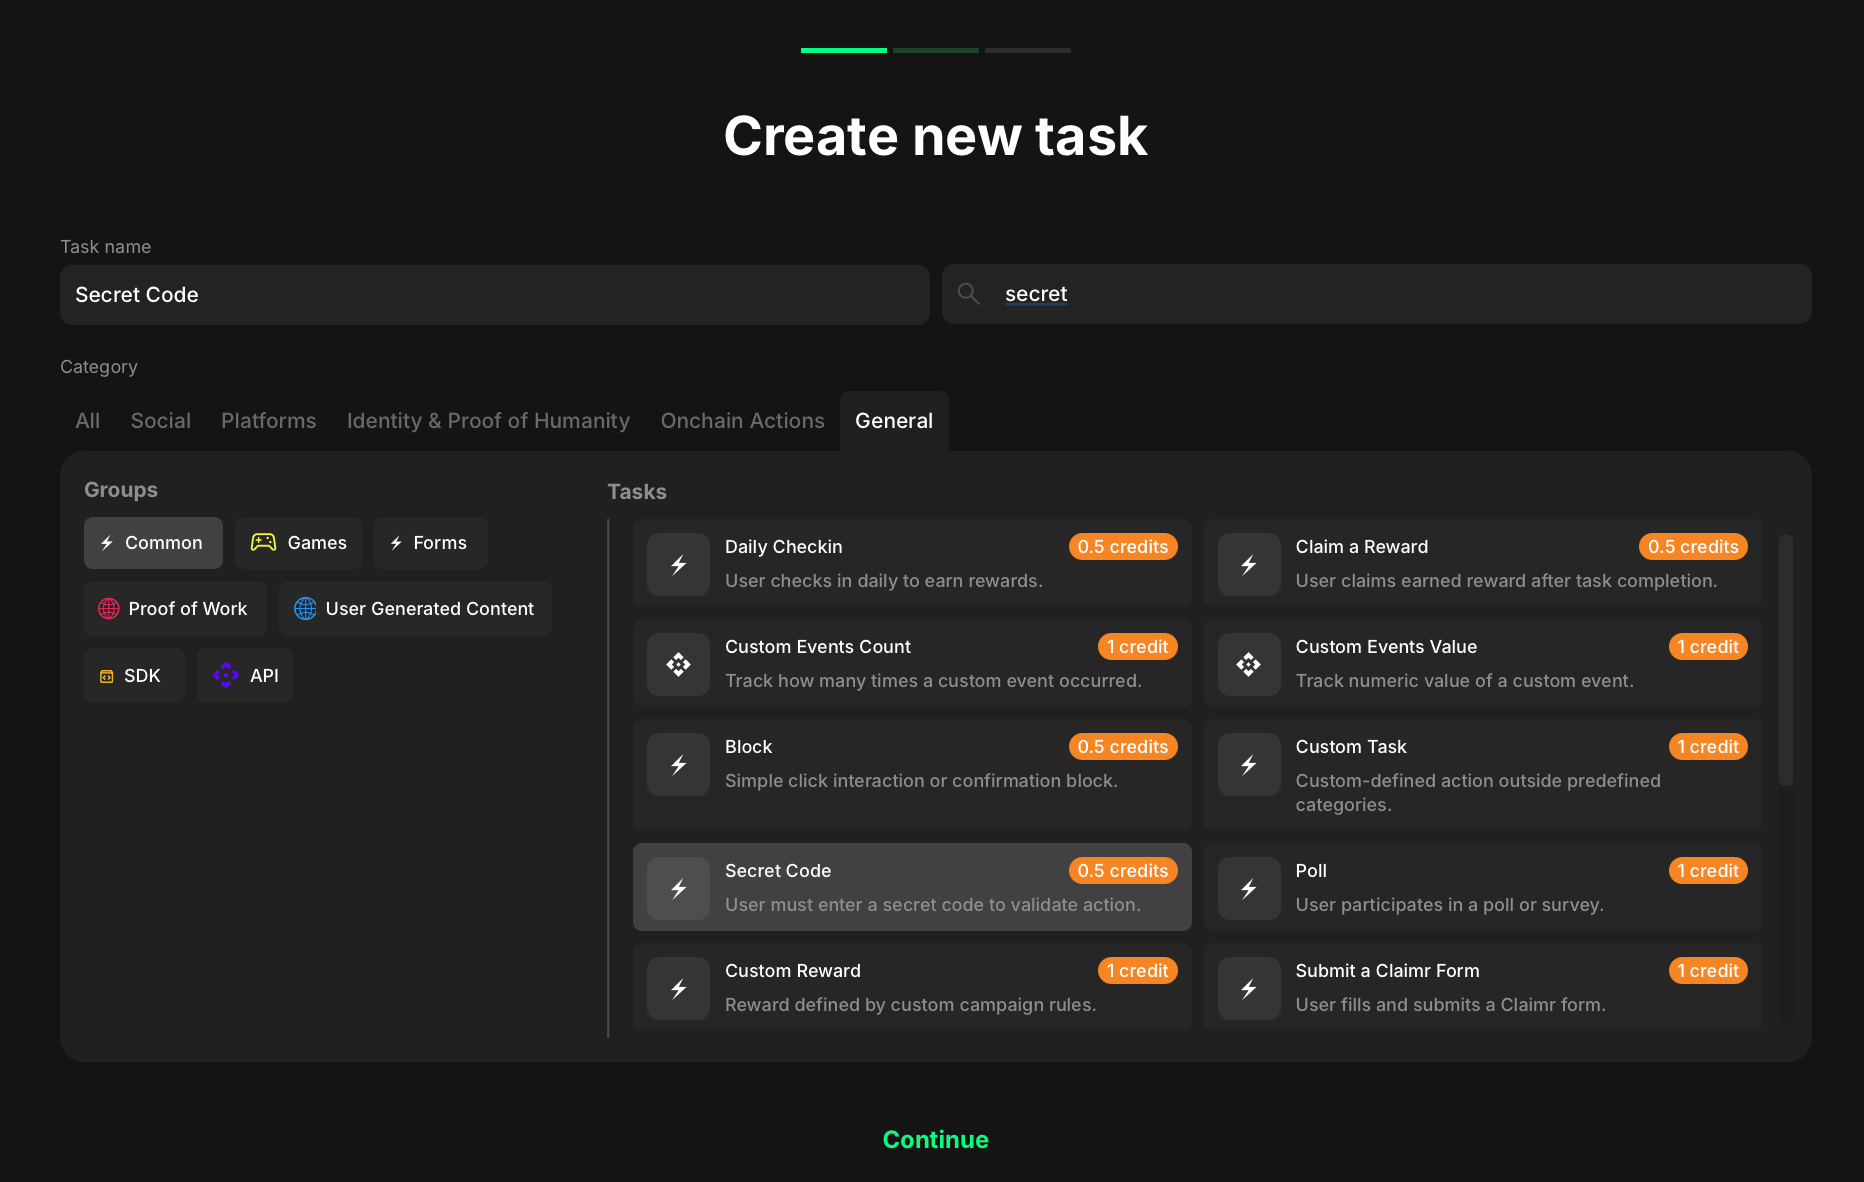 Click **+ Create new task** in the same quest.
Under Category, select **Common**, then choose **Secret code** and click **Continue**.
Click **+ Create new task** in the same quest.
Under Category, select **Common**, then choose **Secret code** and click **Continue**.
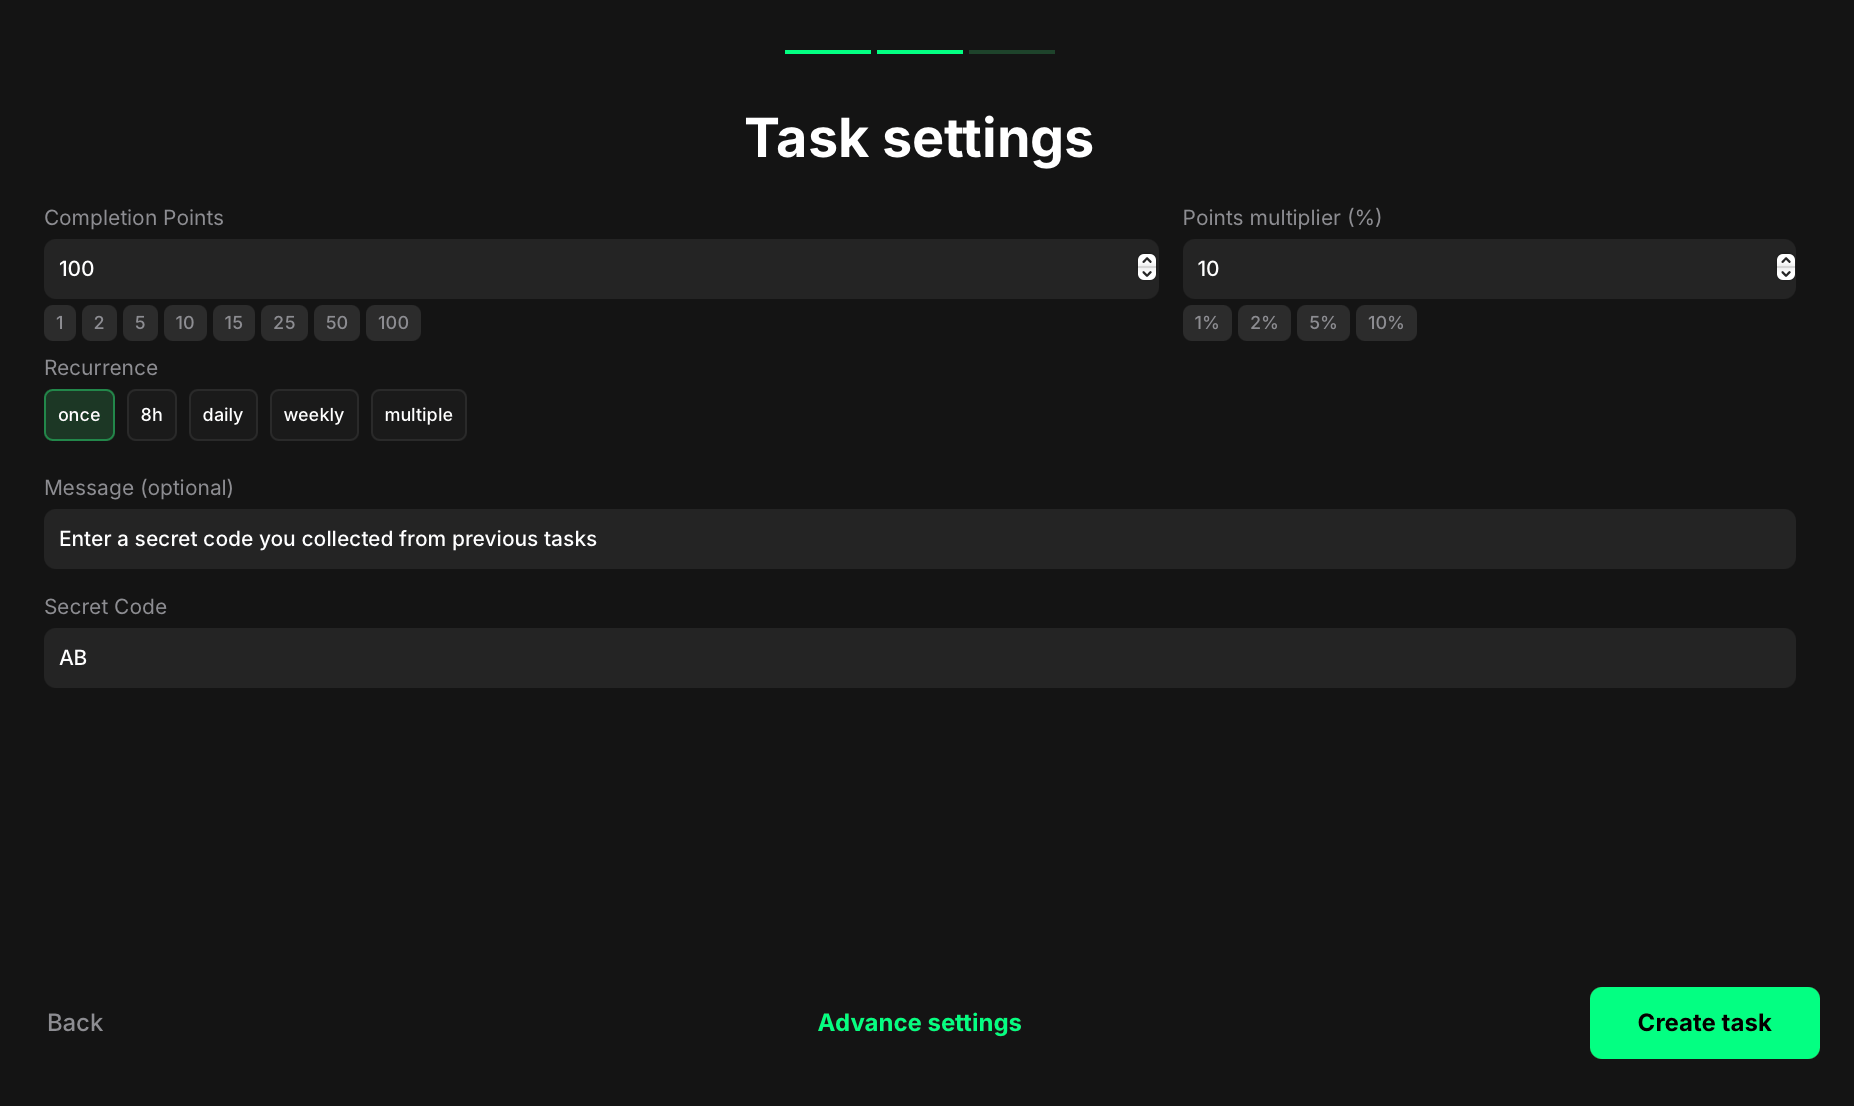 * **Completion points:** Set the number of points awarded when the user submits the correct code.
* **Points multiplier (%):** Add a percentage-based bonus to the total reward. Example: a 5% multiplier increases the final reward by 5%.
* **Recurrence:** Control how often users can complete the task:
* **Once** — can only be completed one time per user.
* **8h** — available once every eight hours.
* **Daily** — available once every 24 hours.
* **Weekly** — available once every 7 days.
* **Multiple** — stays open and can be completed as many times as needed, one after another, without any waiting time.
* **Message (optional):** Enter a message displayed above the input field to guide users.
* **Secret Code:** Enter the correct answer (case-sensitive).
Click **Create task** to save.
All created tasks will appear in your campaign.
* **Completion points:** Set the number of points awarded when the user submits the correct code.
* **Points multiplier (%):** Add a percentage-based bonus to the total reward. Example: a 5% multiplier increases the final reward by 5%.
* **Recurrence:** Control how often users can complete the task:
* **Once** — can only be completed one time per user.
* **8h** — available once every eight hours.
* **Daily** — available once every 24 hours.
* **Weekly** — available once every 7 days.
* **Multiple** — stays open and can be completed as many times as needed, one after another, without any waiting time.
* **Message (optional):** Enter a message displayed above the input field to guide users.
* **Secret Code:** Enter the correct answer (case-sensitive).
Click **Create task** to save.
All created tasks will appear in your campaign.
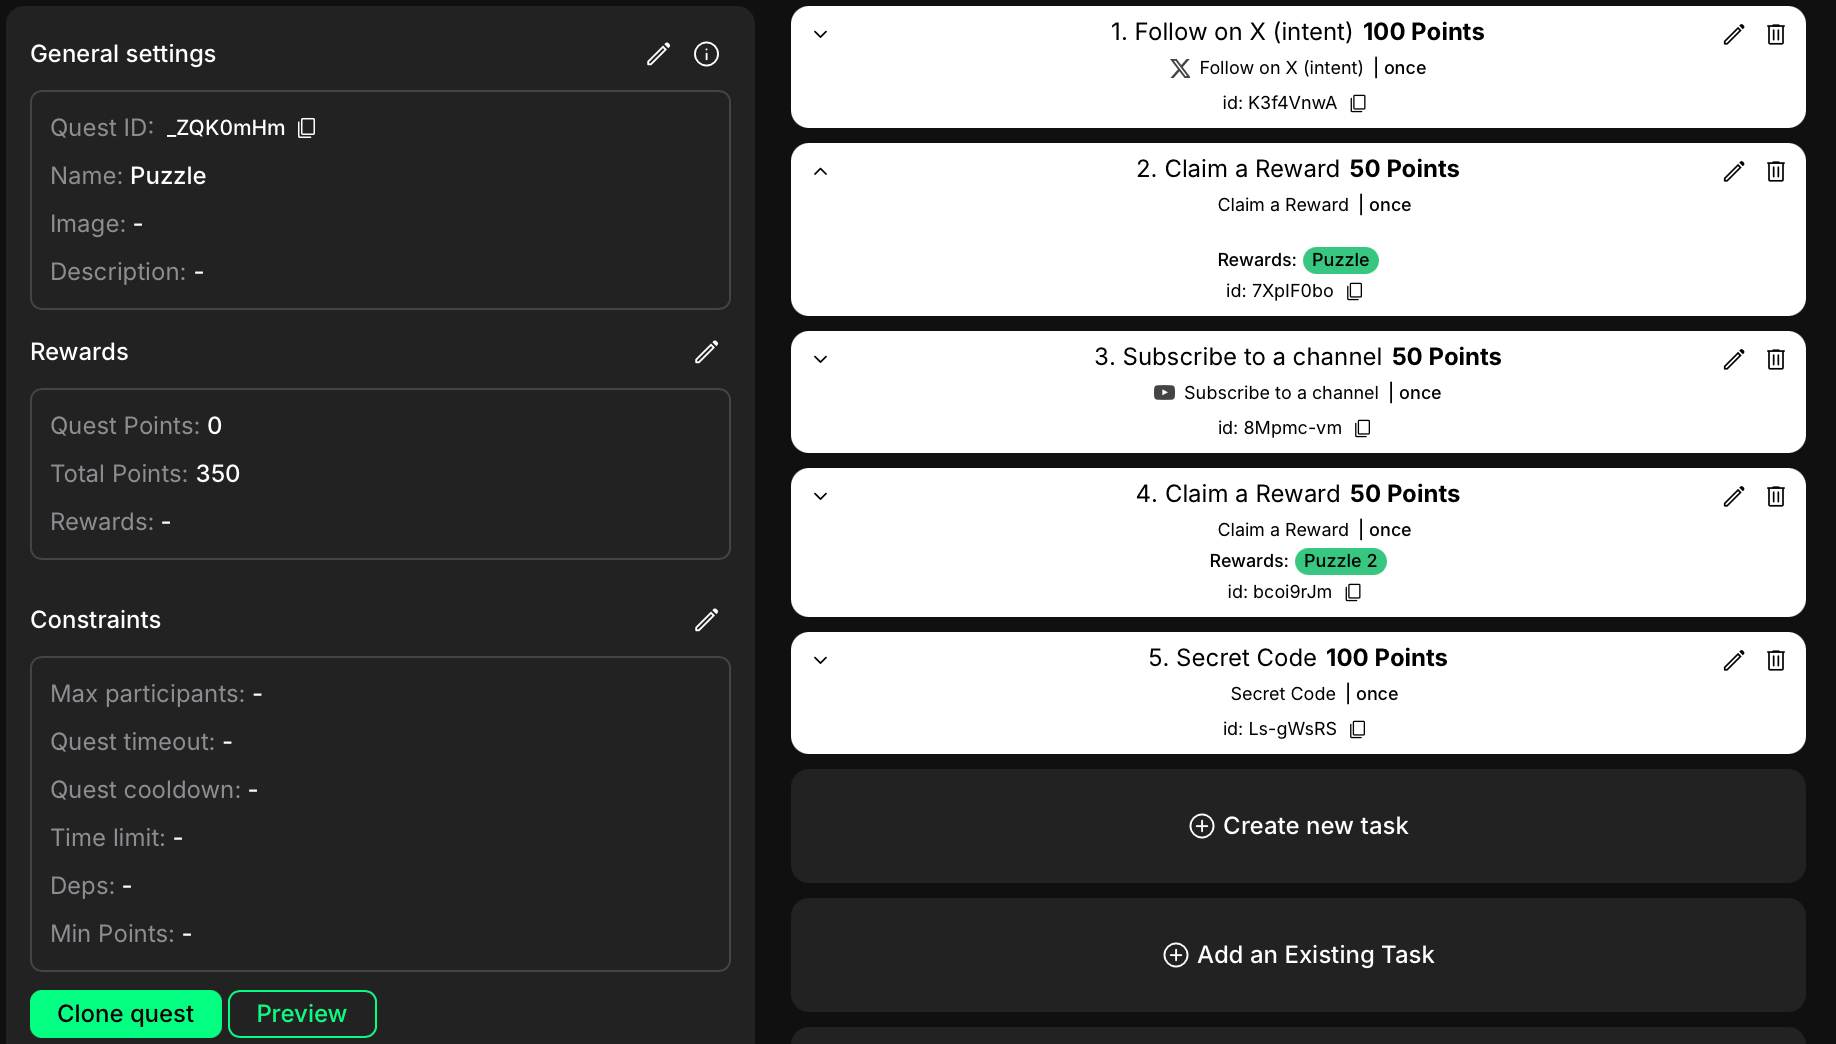 Go through them, change the order if needed, and preview how they'll appear to users:
1. Click the **Preview** button (play icon) from the task or quest settings.
2. The preview opens in a new tab and shows desktop, tablet, and mobile views.
Try interacting with the task flow to verify logic and visibility.
## How Secret code tasks appear to users
Go through them, change the order if needed, and preview how they'll appear to users:
1. Click the **Preview** button (play icon) from the task or quest settings.
2. The preview opens in a new tab and shows desktop, tablet, and mobile views.
Try interacting with the task flow to verify logic and visibility.
## How Secret code tasks appear to users
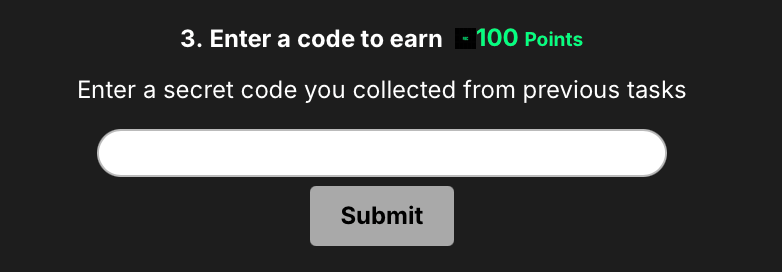 When users encounter a Secret code task, they see:
* The instruction message you added (if any).
* An input field.
* A submit button.
If they enter the correct code, the task is marked complete and the reward is granted. If incorrect, the task remains incomplete.
If Recurrence is set to Multiple, users can return and attempt again without waiting.
When users encounter a Secret code task, they see:
* The instruction message you added (if any).
* An input field.
* A submit button.
If they enter the correct code, the task is marked complete and the reward is granted. If incorrect, the task remains incomplete.
If Recurrence is set to Multiple, users can return and attempt again without waiting.