> ## Documentation Index
> Fetch the complete documentation index at: https://docs.claimr.io/llms.txt
> Use this file to discover all available pages before exploring further.
# Intro pop-up
> Build a custom form with Claimr's Forms feature, assign it as your campaign's intro pop-up, and preview the onboarding flow.
An **Intro pop-up** is a custom message or sequence of messages that appears to users when they first enter your Claimr campaign. It's built using Claimr's **Forms** feature and is an excellent way to welcome users, provide essential information, or set the stage for your campaign before they access the main quests and tasks. You can include text, images, and create multiple pages for a more detailed onboarding experience.
## Why use intro pop-ups?
Implementing an intro pop-up can significantly enhance the user experience:
* **Onboard new users**: Smoothly introduce users to the campaign's purpose, theme, or how to participate.
* **Guide users**: Provide initial instructions or context before users dive into tasks. Clearly communicate crucial rules, guidelines, or prerequisites upfront.
* **Create a customized start**: Offer a branded and tailored welcome experience.
## Create and implement an intro pop-up
Setting up an intro pop-up involves two main stages: creating a custom form and assigning it to your campaign.
### 1. Create the custom form for your pop-up
First, you need to design the content of your pop-up using the **Forms** feature.
Go to the **Forms** section in your Claimr dashboard.
 Click **Create form**. A new form preset will open, providing a starting point for your design.
 Write a caption and click **+ Page** to begin designing your form. This will add your first page.
To include a welcome message, instructions, images, or any other introductory content, click **+ Block** and select the **Rich Text** block type.
Write a caption and click **+ Page** to begin designing your form. This will add your first page.
To include a welcome message, instructions, images, or any other introductory content, click **+ Block** and select the **Rich Text** block type.
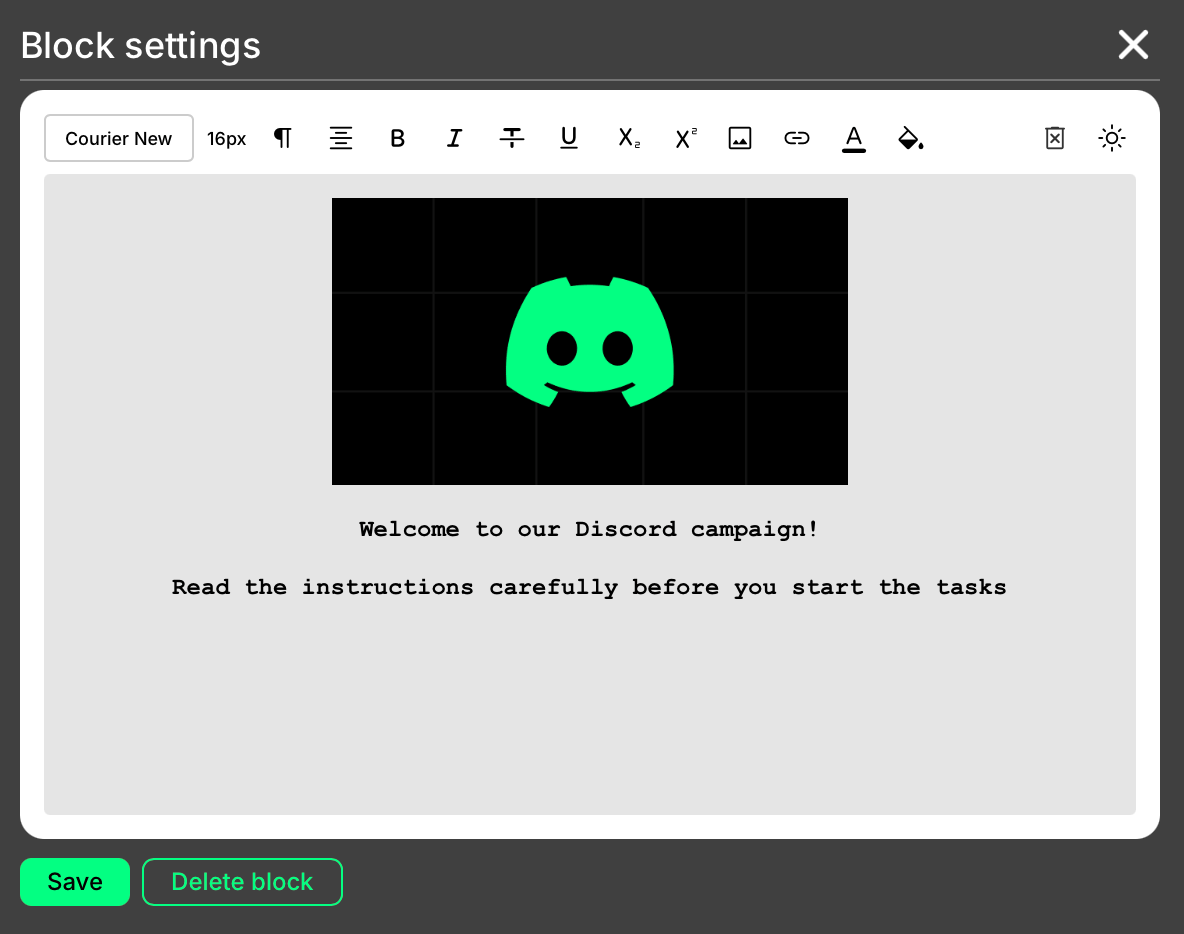
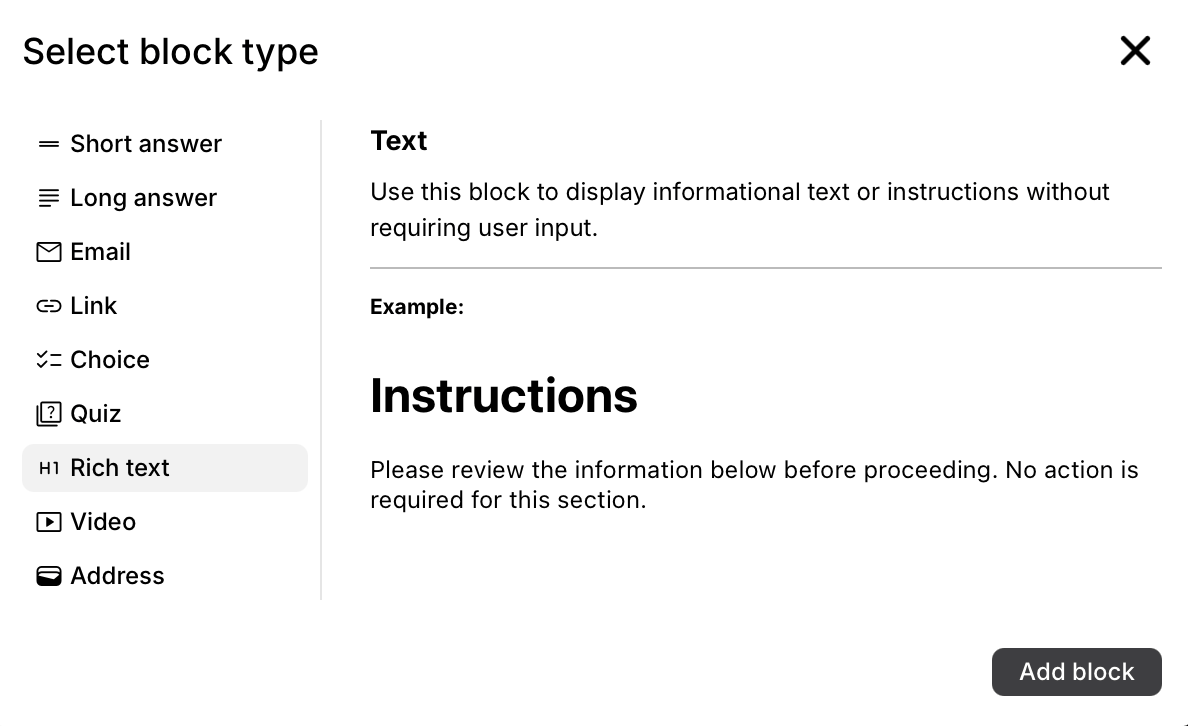 Click **Add block** for the Rich Text type. This will immediately open the **Block settings** window, which functions as a text editor. Here, you can type your welcome message and use the toolbar to format your text. For more details on descriptions and tags, visit the [Descriptions: creation, usage, tags](/descriptions-creation-usage-tags) article.
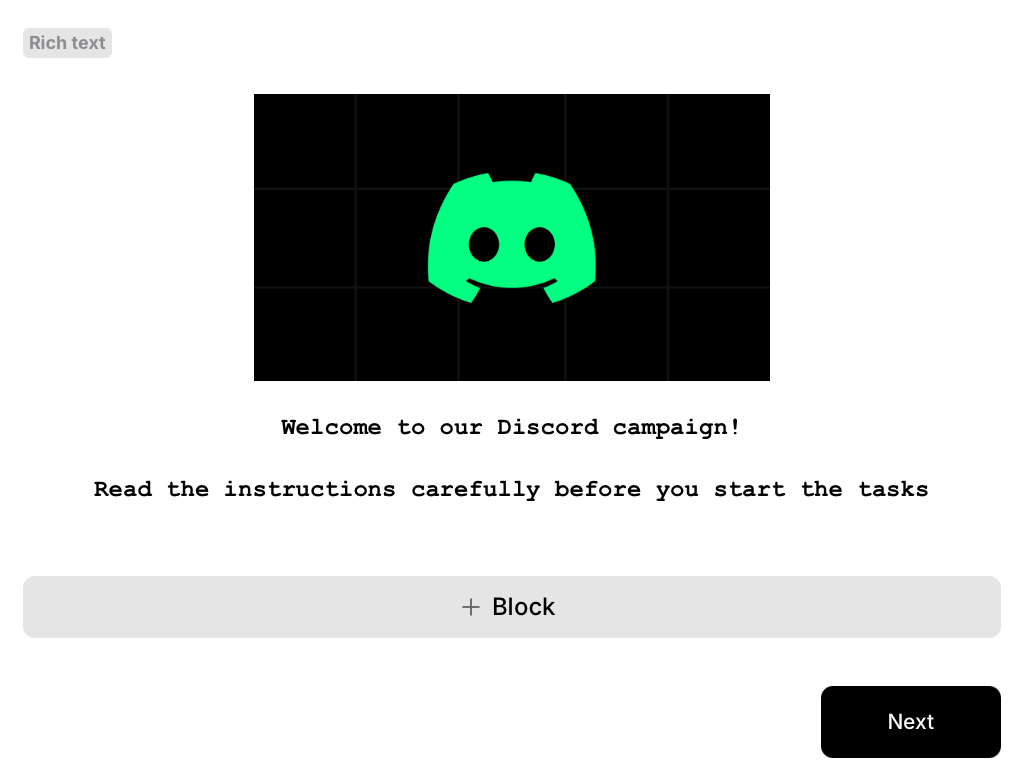
 For pop-ups that require multiple screens, you can add more pages to your form by clicking **+ Page** again. Users will then move through these screens using a navigation button.
The text on the button used to move between pages (e.g., "Next," "Continue," "Got it!") is configured manually when you set up the form's pagination within the Form builder.
For pop-ups that require multiple screens, you can add more pages to your form by clicking **+ Page** again. Users will then move through these screens using a navigation button.
The text on the button used to move between pages (e.g., "Next," "Continue," "Got it!") is configured manually when you set up the form's pagination within the Form builder.
 Once your form content is ready, give it a memorable name and save it.
### 2. Assign the form as an intro pop-up
After your custom form is created and saved:
Navigate to the specific **Campaign** where you want to use this pop-up.
Go to the campaign **Settings**.
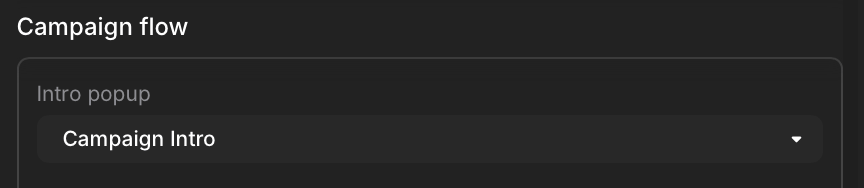
Select the **Campaign flow** section from the settings menu.
Click the dropdown menu for **Intro Pop-up** and select the custom form you created above.
Once your form content is ready, give it a memorable name and save it.
### 2. Assign the form as an intro pop-up
After your custom form is created and saved:
Navigate to the specific **Campaign** where you want to use this pop-up.
Go to the campaign **Settings**.
Select the **Campaign flow** section from the settings menu.
Click the dropdown menu for **Intro Pop-up** and select the custom form you created above.
 Click **Update** to save your changes.
### 3. Preview your intro pop-up
It's important to see how your campaign will look to users:
1. Use your campaign's **Preview mode**, accessible from the main campaign settings page or dashboard.
2. When you start the campaign in preview, you should see your custom form appear as a pop-up immediately over the main campaign interface.
3. Click through all the pages of your pop-up (if you created a multi-page form) to ensure the content and navigation buttons work as expected.
4. After closing or completing the intro pop-up, you should then see the main content of your campaign.
Click **Update** to save your changes.
### 3. Preview your intro pop-up
It's important to see how your campaign will look to users:
1. Use your campaign's **Preview mode**, accessible from the main campaign settings page or dashboard.
2. When you start the campaign in preview, you should see your custom form appear as a pop-up immediately over the main campaign interface.
3. Click through all the pages of your pop-up (if you created a multi-page form) to ensure the content and navigation buttons work as expected.
4. After closing or completing the intro pop-up, you should then see the main content of your campaign.