> ## Documentation Index
> Fetch the complete documentation index at: https://docs.claimr.io/llms.txt
> Use this file to discover all available pages before exploring further.
# Framer integration
> Set up a frame and configure a Code Override to embed the Claimr widget into your Framer designs.
Integrating your Claimr widget into Framer allows you to seamlessly display your interactive content within your Framer designs. This guide will walk you through the process, which involves setting up a frame and configuring a Code Override to embed the widget.
## Create a frame in Framer
In Framer, everything begins with a frame. This frame will serve as the container for your Claimr widget.
* Create a new **Frame** in your Framer project.
* You can style this frame as needed, or leave it with default styling.
## Access Code overrides
To embed the Claimr widget, you will use Framer's Code Overrides feature, which allows you to extend component functionality with custom code.
* Select your newly created Frame.
* In the right-hand properties panel, scroll down and open the **Code Overrides** tab at the bottom.
* Click the **+** button to add a new file. If no override file exists, you will be prompted to create one.
## Create the Override File
This file will contain the custom code necessary to initialize and load your Claimr widget.
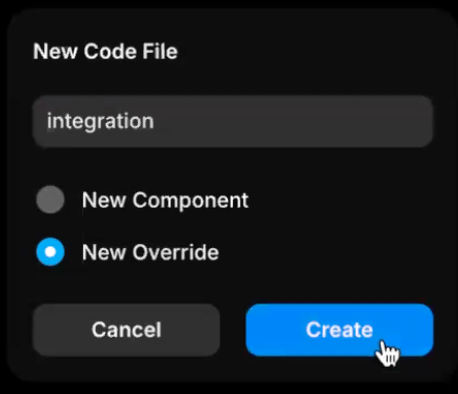 Name your file (e.g., `claimrIntegration.tsx`) and click **Create**. In the newly opened code editor, paste the override code for your integration. This code sets up the mechanism to load the Claimr widget.
## Edit the Override Code
You will need to modify the override file to include specific `data-` attributes that define your Claimr widget's behavior and link it to your campaign.
Name your file (e.g., `claimrIntegration.tsx`) and click **Create**. In the newly opened code editor, paste the override code for your integration. This code sets up the mechanism to load the Claimr widget.
## Edit the Override Code
You will need to modify the override file to include specific `data-` attributes that define your Claimr widget's behavior and link it to your campaign.
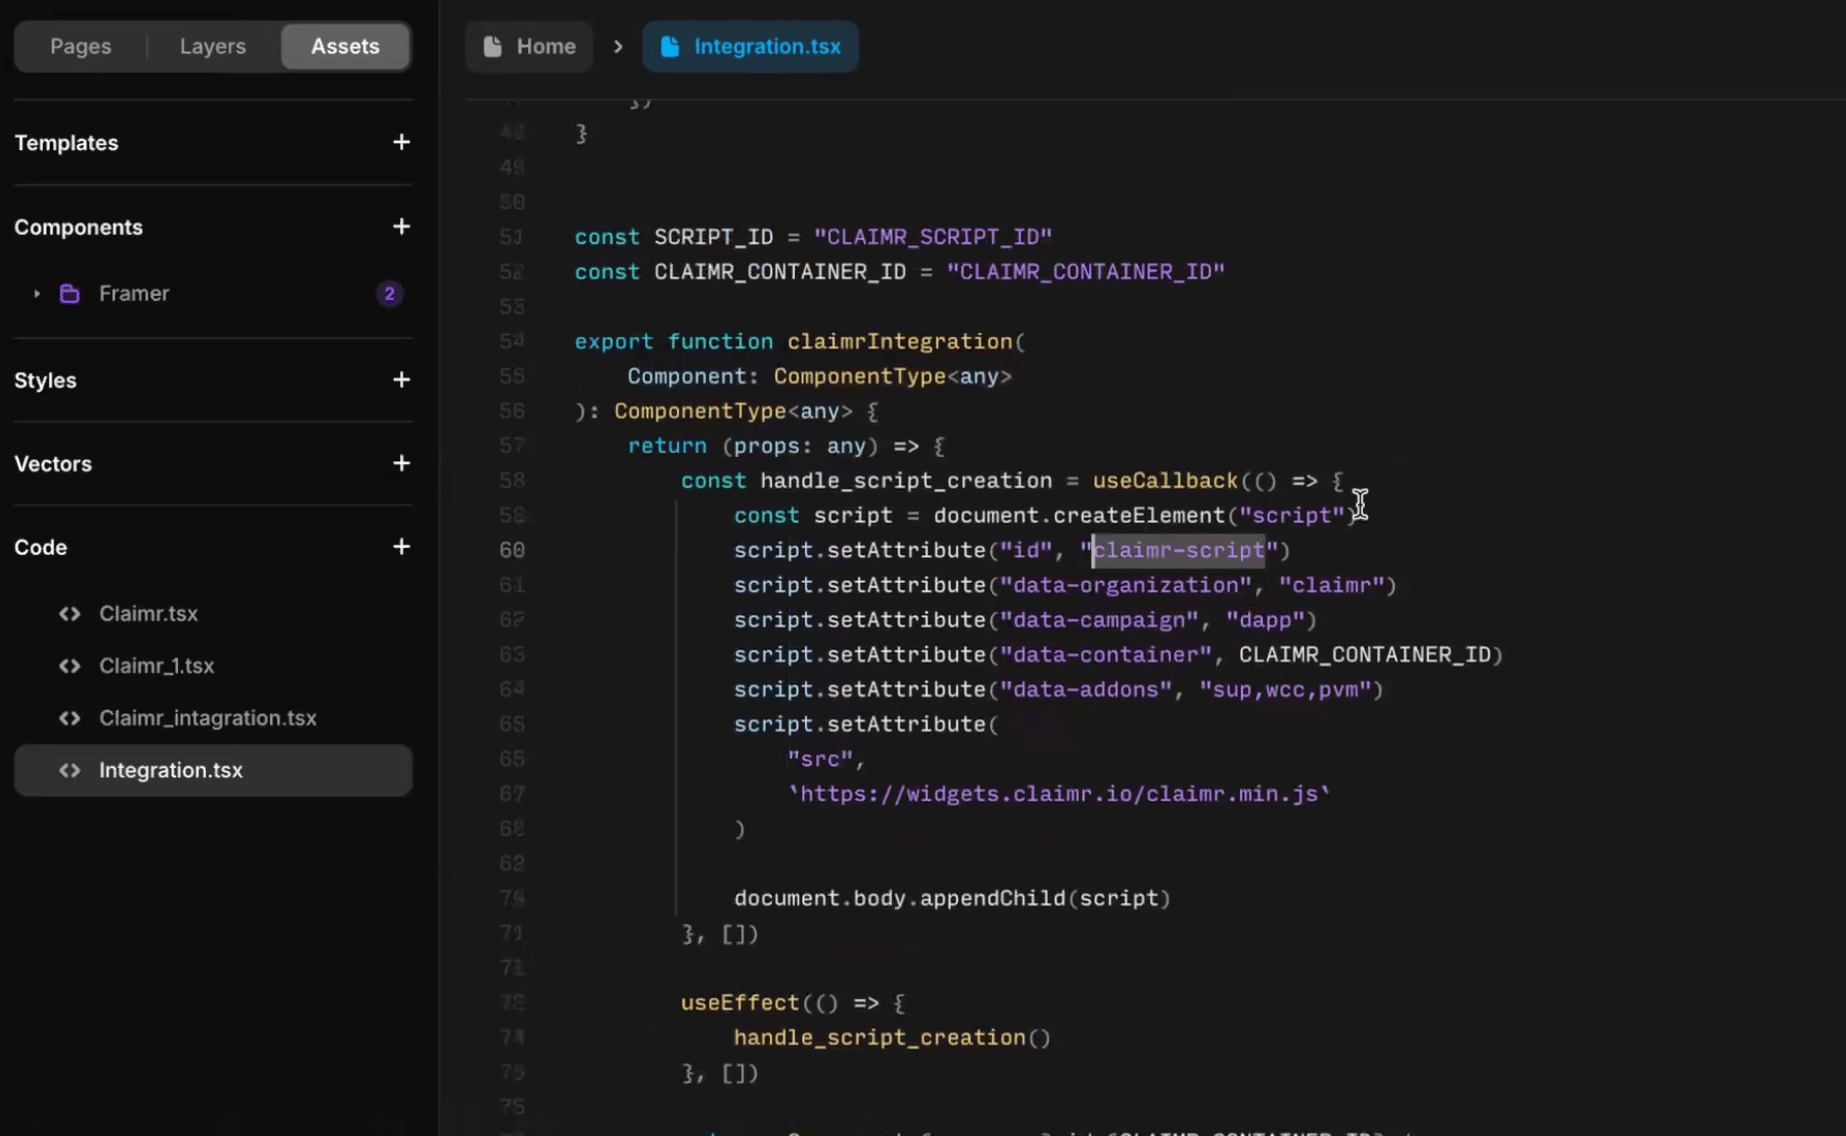 Within the override file, find or create a function (e.g., `claimrIntegration`). Pass all the necessary `data-` attributes required for your Claimr widget to this function. These attributes are crucial for the widget to correctly identify your campaign and organization:
* `data-id`: The ID of your widget instance.
* `data-organization`: Your organization's name.
* `data-company`: Your company's name.
* `data-container-id`: This attribute should match the ID of the Framer frame you created earlier, which will act as the widget's container.
**Example of an override function**
```typescript theme={"dark"}
import { Override } from "framer"
const SCRIPT_ID = "CLAIMR_SCRIPT_ID"
const CLAIMR_CONTAINER_ID = "CLAIMR_CONTAINER_ID"
export function claimrIntegration(
Component: ComponentType
): Override {
return {
onMount: (props: any) => () => {
const handle_script_creation = useCallback(() => {
const script = document.createElement("script")
script.setAttribute("id", "claimer-script")
script.setAttribute("data-organization", "Claimr")
script.setAttribute("data-campaign", "dapp")
script.setAttribute("data-container", CLAIMR_CONTAINER_ID)
script.setAttribute("data-add-ons", "sup,wcc,pvm")
script.setAttribute("src", "https://widgets.claimr.io/claimr.min.js")
document.body.appendChild(script)
}, [])
useEffect(() => {
handle_script_creation()
}, [])
},
}
}
```
## Link override to your frame
After editing the override code, you need to apply it to your specific Framer frame.
Within the override file, find or create a function (e.g., `claimrIntegration`). Pass all the necessary `data-` attributes required for your Claimr widget to this function. These attributes are crucial for the widget to correctly identify your campaign and organization:
* `data-id`: The ID of your widget instance.
* `data-organization`: Your organization's name.
* `data-company`: Your company's name.
* `data-container-id`: This attribute should match the ID of the Framer frame you created earlier, which will act as the widget's container.
**Example of an override function**
```typescript theme={"dark"}
import { Override } from "framer"
const SCRIPT_ID = "CLAIMR_SCRIPT_ID"
const CLAIMR_CONTAINER_ID = "CLAIMR_CONTAINER_ID"
export function claimrIntegration(
Component: ComponentType
): Override {
return {
onMount: (props: any) => () => {
const handle_script_creation = useCallback(() => {
const script = document.createElement("script")
script.setAttribute("id", "claimer-script")
script.setAttribute("data-organization", "Claimr")
script.setAttribute("data-campaign", "dapp")
script.setAttribute("data-container", CLAIMR_CONTAINER_ID)
script.setAttribute("data-add-ons", "sup,wcc,pvm")
script.setAttribute("src", "https://widgets.claimr.io/claimr.min.js")
document.body.appendChild(script)
}, [])
useEffect(() => {
handle_script_creation()
}, [])
},
}
}
```
## Link override to your frame
After editing the override code, you need to apply it to your specific Framer frame.
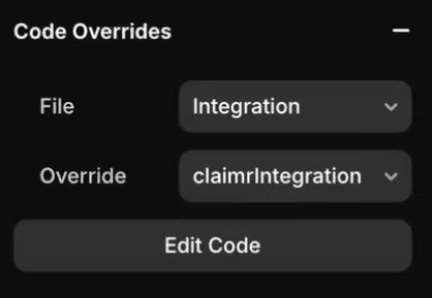 * In the **Layers** tab, select the Frame you created before.
* In the **Code Overrides** section of the right-hand properties panel, select your newly created file.
* From the function dropdown, choose the specific function you defined.
## Finalize and publish your project
Once the override is linked, save your changes and publish the project to see the integrated widget.
* Framer typically autosaves your changes. Ensure all modifications are saved.
* Click **Publish** to deploy your project.
* Verify on the published page that the Claimr widget is successfully integrated and functioning correctly within your Framer design.
* In the **Layers** tab, select the Frame you created before.
* In the **Code Overrides** section of the right-hand properties panel, select your newly created file.
* From the function dropdown, choose the specific function you defined.
## Finalize and publish your project
Once the override is linked, save your changes and publish the project to see the integrated widget.
* Framer typically autosaves your changes. Ensure all modifications are saved.
* Click **Publish** to deploy your project.
* Verify on the published page that the Claimr widget is successfully integrated and functioning correctly within your Framer design.