
Before you start
Make sure you have:- A quest already created in your campaign
- A clear understanding of what you want users to accomplish
- Your reward structure planned out
Access quest settings
1
Navigate to Quests
In your Claimr panel, click Quests in the campaign header menu. You’ll see all quest groups you’ve created.
2
Select your quest
Find the quest you want to configure and click on it. The quest settings page will open.
Quest settings overview
The settings page is organized into collapsible sections. General settings is expanded by default, while other sections start collapsed. Click the + icon next to any section to expand it and configure those settings.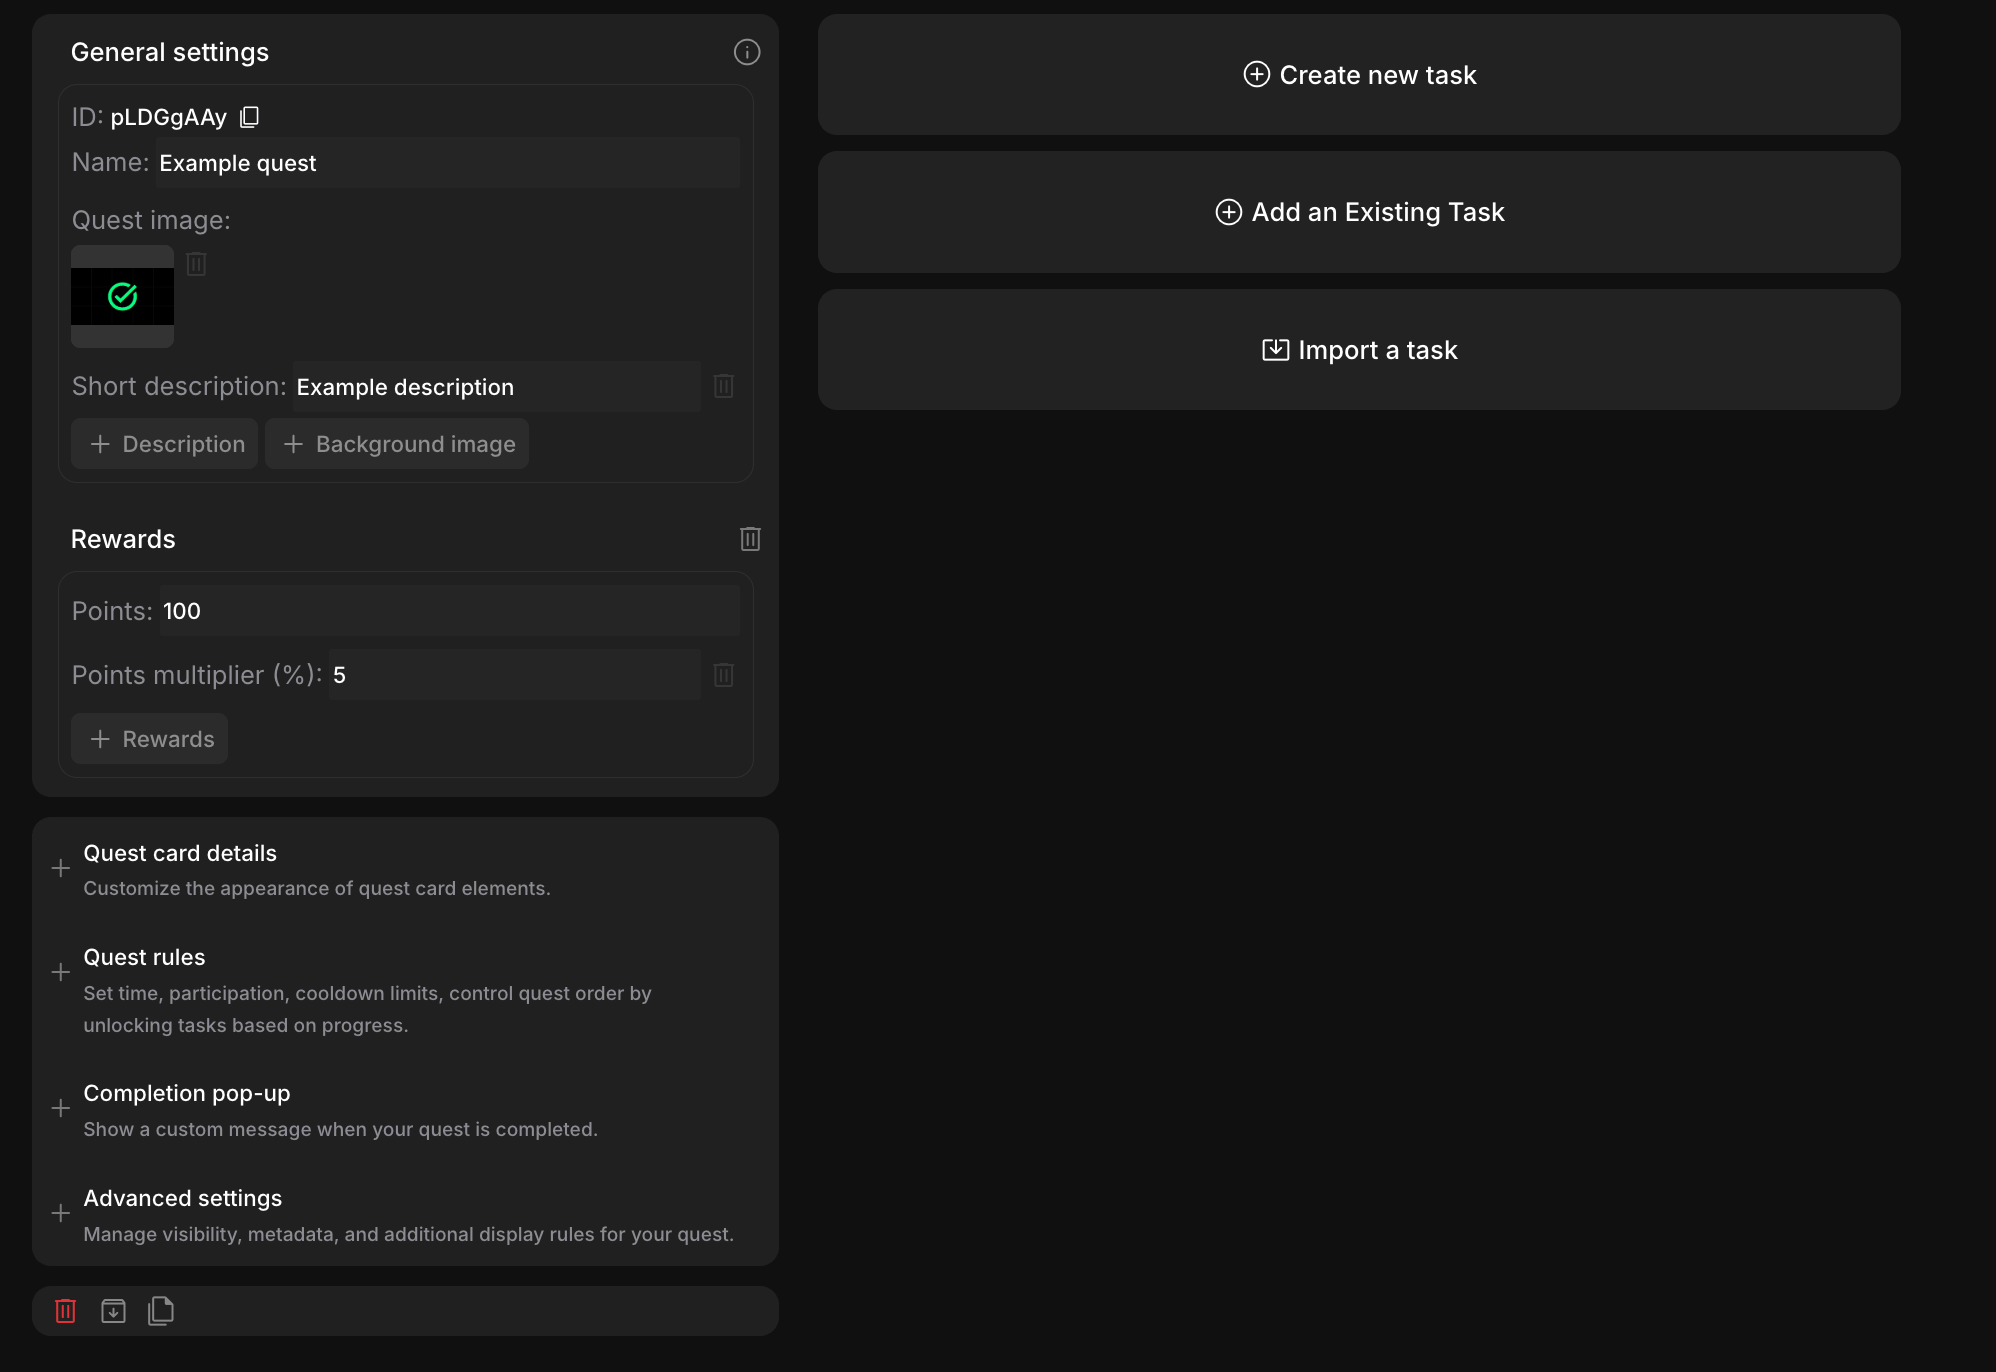
General settings
This section contains the core identity and presentation elements of your quest.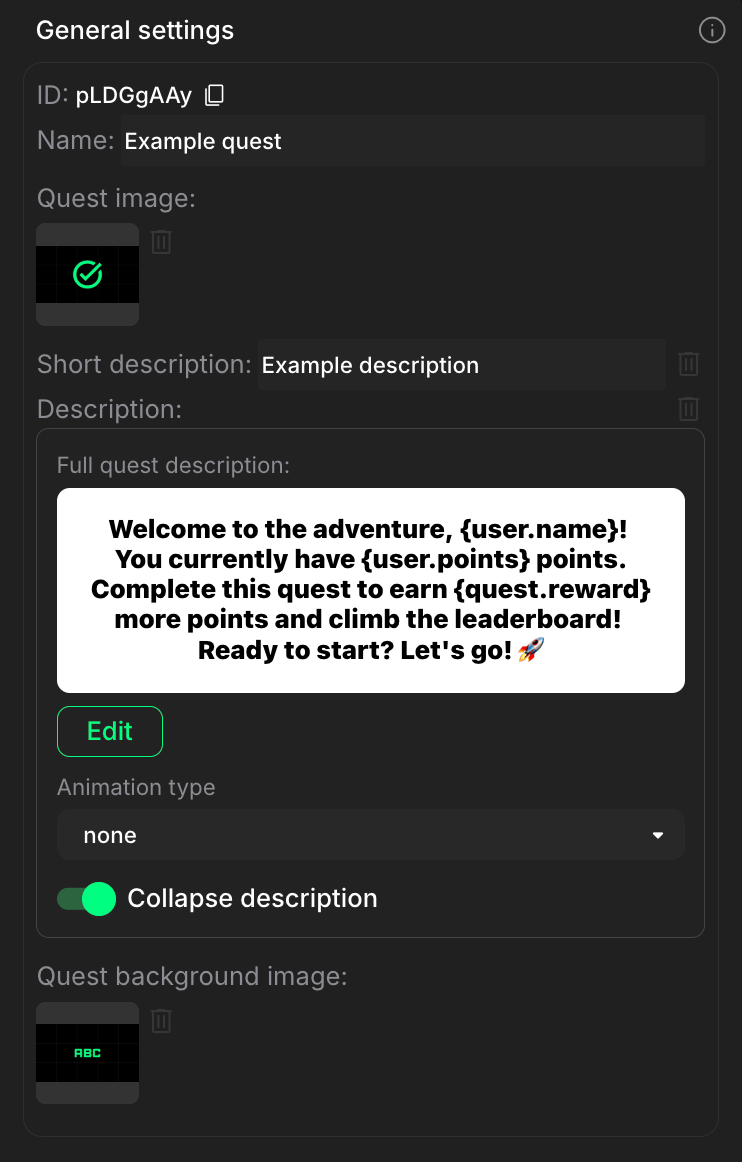
- Click the image thumbnail to edit or replace it
- Click the trash icon to remove the current image
- Click the text to edit it directly
- Explain what users will do and what they’ll earn
- Keep it under 2 sentences
- Click the trash icon to remove it
Description
Add a full description that explains your quest’s goals, rewards, and what users should expect.- Click + Description
- The text editor opens with formatting options
- Write your description using the formatting tools
- Add links, images, or styled text as needed
- Insert the tag: Simply type the tag directly into the text editor when creating or editing the quest description.
- Save your changes: Once you’ve added the tags, save your changes to the quest description.
- View the result: When a user views the quest, the tags will be dynamically replaced with the corresponding information.
- Toggle off: The full description is visible to anyone viewing your quest.
- Toggle on: The description is condensed, showing only a brief summary. Participants need to click Show more to expand and read the full description.
Background image
Use Background image to add a backdrop for your quest card.- Click + Background image
- Select Upload to choose an image from your computer
- The image appears behind your quest content, adding visual depth
Rewards
Define the points, multipliers, and special rewards users earn for completing this quest.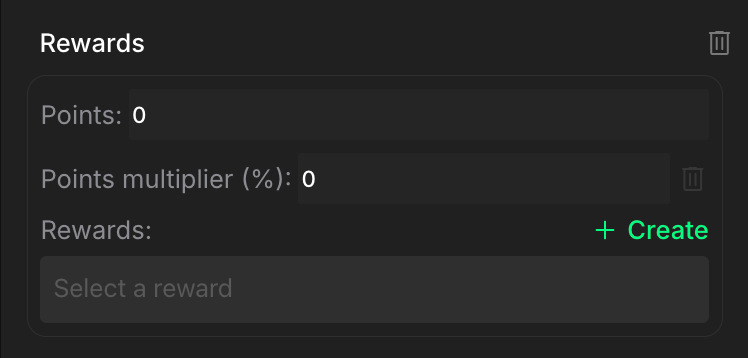
- Consider the effort required and your campaign’s point economy
- The field shows the current value
- Example: 100 points with 5% multiplier = 105 total points
- Use this to highlight important quests or run promotions
- Click the trash icon to remove the multiplier
Balance your reward structure to ensure it’s both motivating and sustainable for your campaign. Too few points might not incentivize participation, while too many could deplete your reward pool quickly.
Create a reward
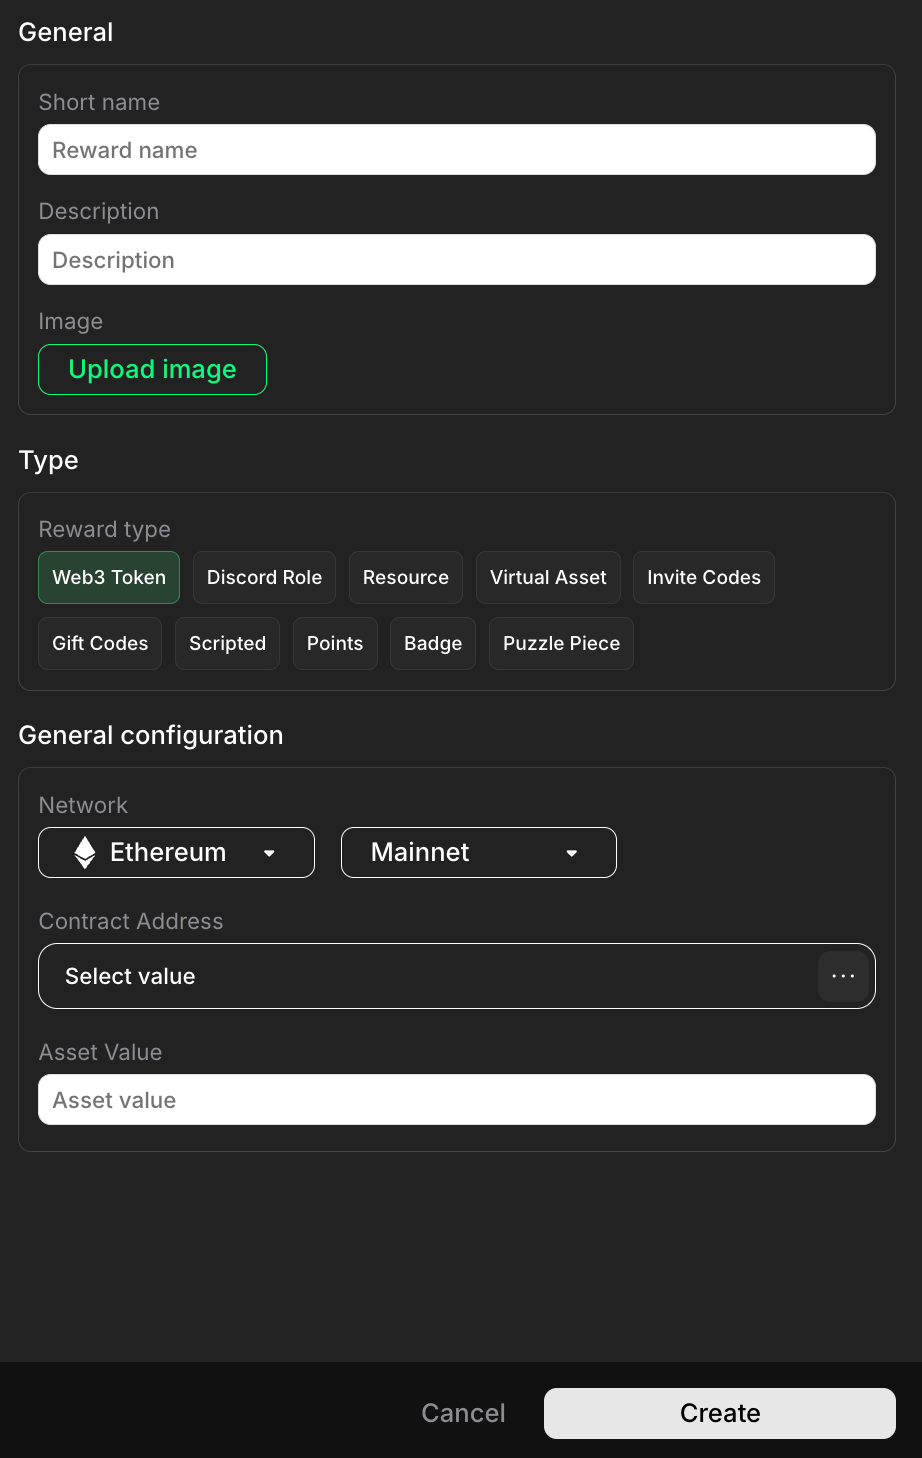
- Short name: Enter an internal name for your reference (e.g., “Reward name”).
- Description: Explain what this reward is and why users want it.
- Image: Click Upload image to add a visual representation of your reward.
- Web3 Token - Cryptocurrency or token rewards
- Discord Role - Grant Discord server roles
- Resource - Custom resource or asset
- Virtual Asset - In-game or virtual items
- Invite Codes - Access codes users can share
- Gift Codes - Redeemable gift codes
- Scripted - Custom scripted rewards
- Points - Additional point rewards
- Badge - Achievement badges
- Puzzle Piece - Collectible puzzle elements
Quest card details
Customize how your quest appears in the campaign widget.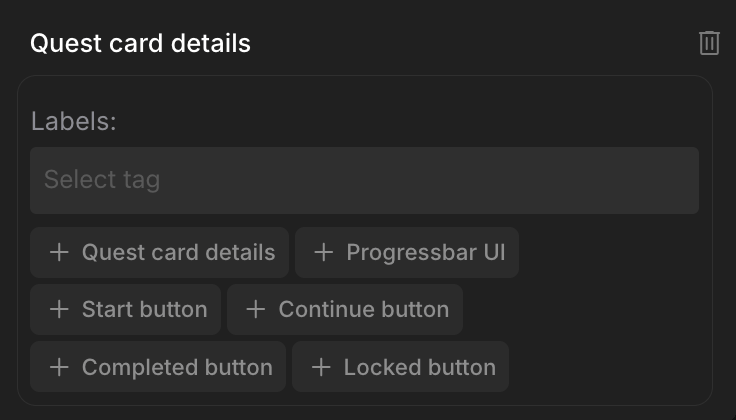
- Click Select tag to choose from existing tags
- Click the x to remove a tag
Button text customization
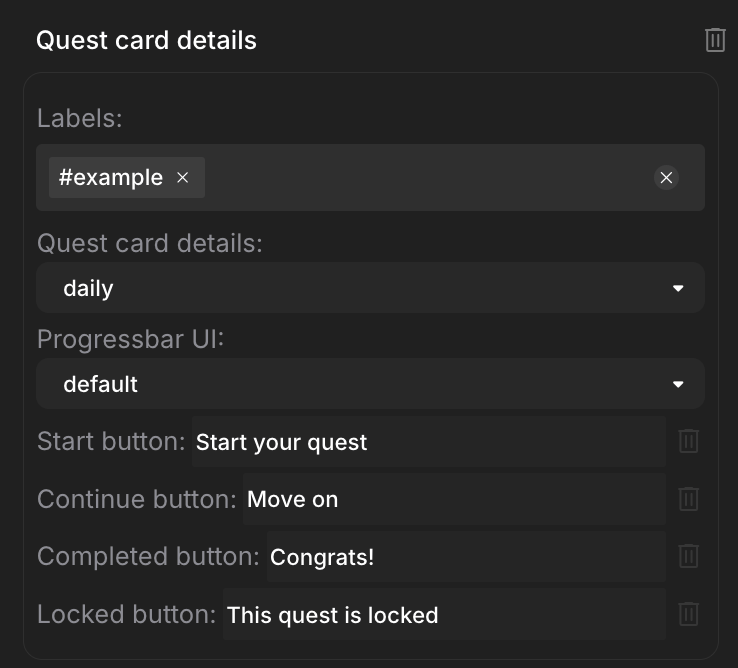
- Start button: Edit the text shown when users first see the quest.
- Continue button: Edit the text shown when users are in progress.
- Completed button: Edit the text shown when the quest is finished.
- Locked button: Edit the text shown when the quest isn’t accessible yet.
Use clear and concise button text that accurately reflects the action it triggers. This helps users understand the quest flow and avoid confusion.
Quest rules
Control when, how, and who can participate in your quest.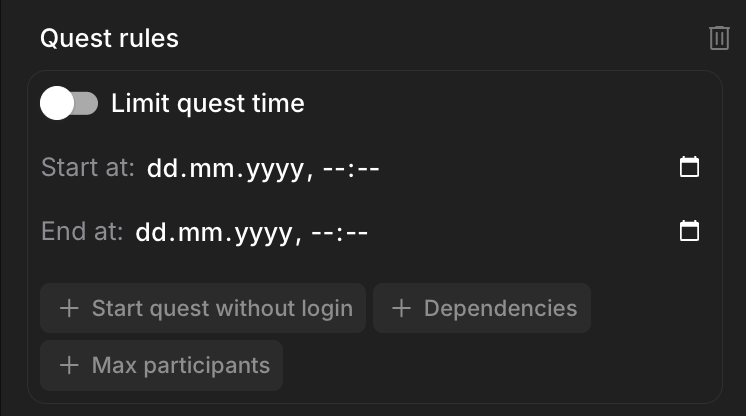
Limit quest time
Toggle this on to set start and end dates for your quest availability.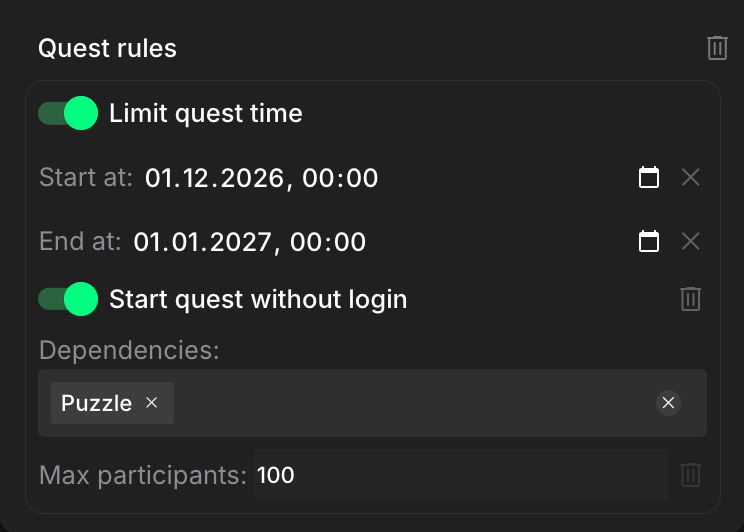
- Start at: Click the calendar icon to select when the quest becomes available. Users can’t access the quest before this time. Click the x to clear the date.
- End at: Click the calendar icon to select when the quest closes. Users can’t start or continue after this time. Click the x to clear the date.
Additional options
Click the + icon to expand these options.- Start quest without login: Toggle this on to allow users to view and interact with the quest without logging in. Useful for preview or demo quests.
- Dependencies: Set prerequisites users must complete before accessing this quest. Click to open the dependencies selector.
- Max participants: Enter a number to limit how many users can complete this quest. The quest locks automatically when the limit is reached. Great for exclusive or limited-time rewards.
Completion pop-up
Show users a custom message when they finish your quest.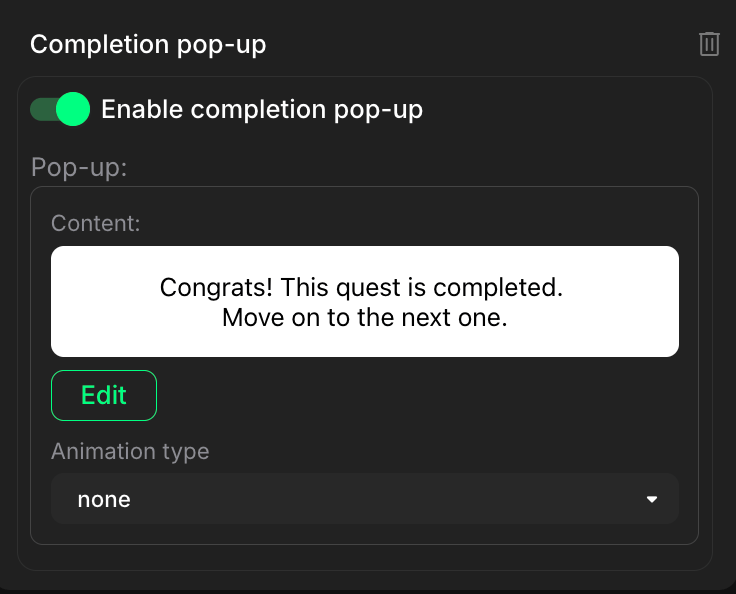
Advanced settings
Manage visibility, metadata, and additional display rules for your quest.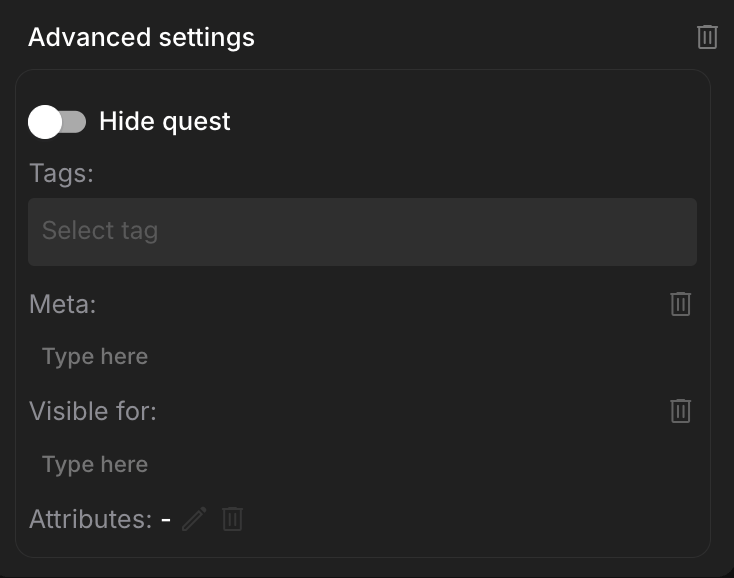
new_users, beta_testers, europe_only). To add multiple tags, separate them with commas. To remove a tag, click the x next to its name.
- Organize and segment: Use tags for internal categorization or to target content delivery (e.g., show this quest only to users who match the
new_userstag passed in the script). - Create phased experiences: Unlock this quest progressively for users who acquire certain tags.
- A/B test content: Direct different user segments to alternatively tagged quests.
- Manage access: Restrict or grant access to this quest based on user tags.
Quest actions
Manage your quest with these options available at the bottom of the settings page.- Delete: Click the trash icon to permanently remove this quest from your campaign. A confirmation prompt appears to prevent accidental deletions. This action cannot be undone. All quest data and user progress will be lost.
- Archive: Click the download icon to archive your quest configuration. Save quest settings for future reference. Useful for backing up quest data before major changes.
- Clone: Click the copy icon to create a clone of this quest. The copy appears in the same quest group. Useful for creating similar quests quickly or testing variations.
Saving your settings
After you’ve configured all sections of your quest, all changes save automatically as you make them. Review all sections to ensure everything is correct, then test your quest in the widget to verify it works as expected.What to do next
Now that your quest is configured:- Add tasks - Create the specific actions users will complete within this quest
- Monitor performance in Data analytics - Track how users engage with your quest