
What are HTTP request tasks?
HTTP Request tasks allow you to integrate your own APIs into your Claimr quests, giving you greater flexibility and control over task completion logic. These tasks send HTTP requests to your API endpoints and process the responses to determine task completion or reward amounts. Use HTTP Request tasks to:- Leverage your existing API infrastructure
- Configure tasks without requiring specific settings within Claimr
- Define custom logic for task completion based on the response from your API
- Validate user actions through your own backend systems
For detailed information about general task settings, including task name, header, description, rewards, dependencies, and more, refer to Task Settings.
Create your task
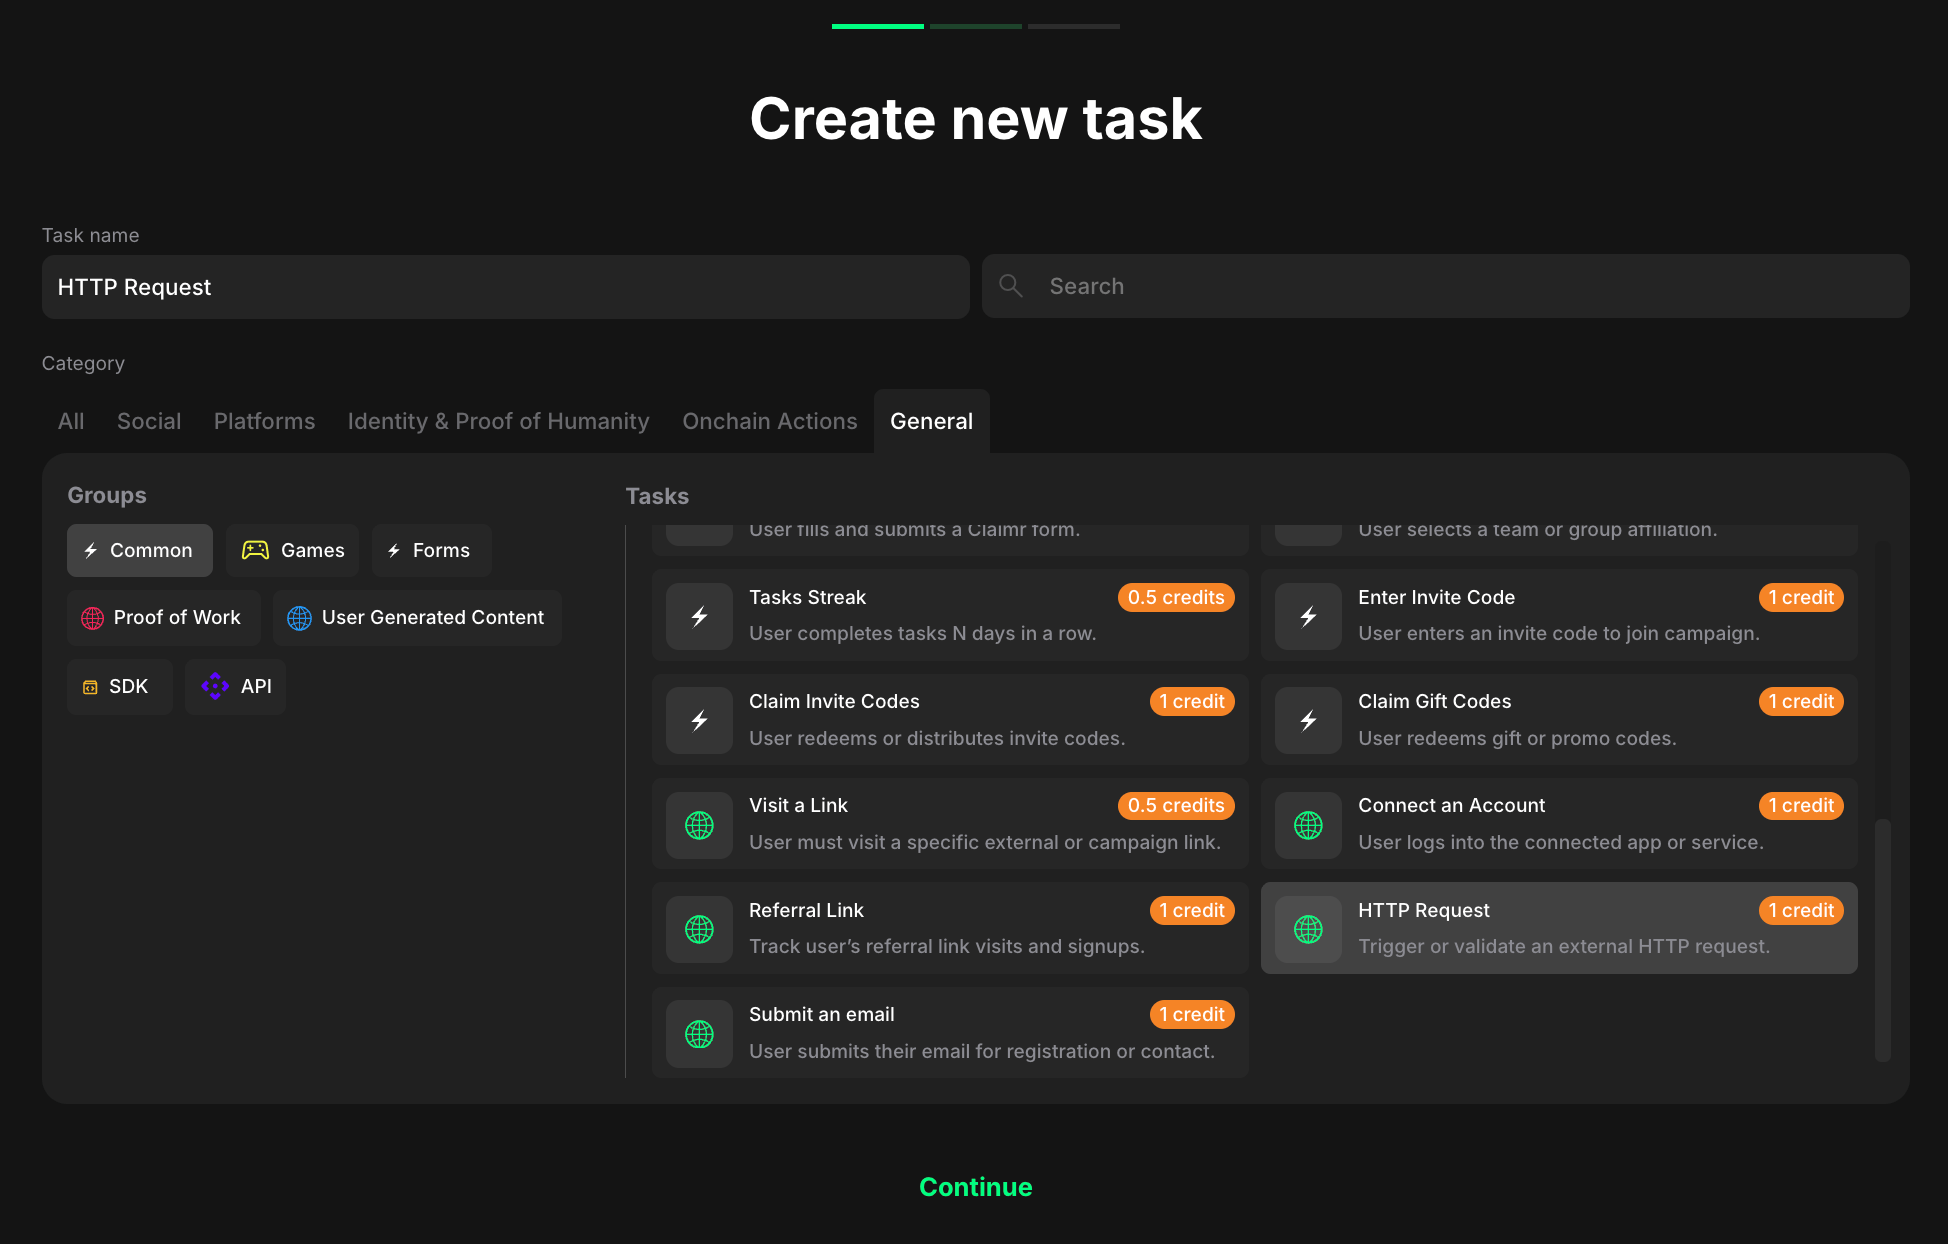
Select HTTP Request
- From your campaign dashboard, go to the Quests tab and click on the quest where you want to add an HTTP Request task.
- On the quest settings page, click + Create new task.
- In the Category section, click General.
- In the Groups section, click Common.
- Select HTTP Request from the Tasks list.
- Click Continue.
Task settings
This section allows you to configure the specifics of your HTTP request task.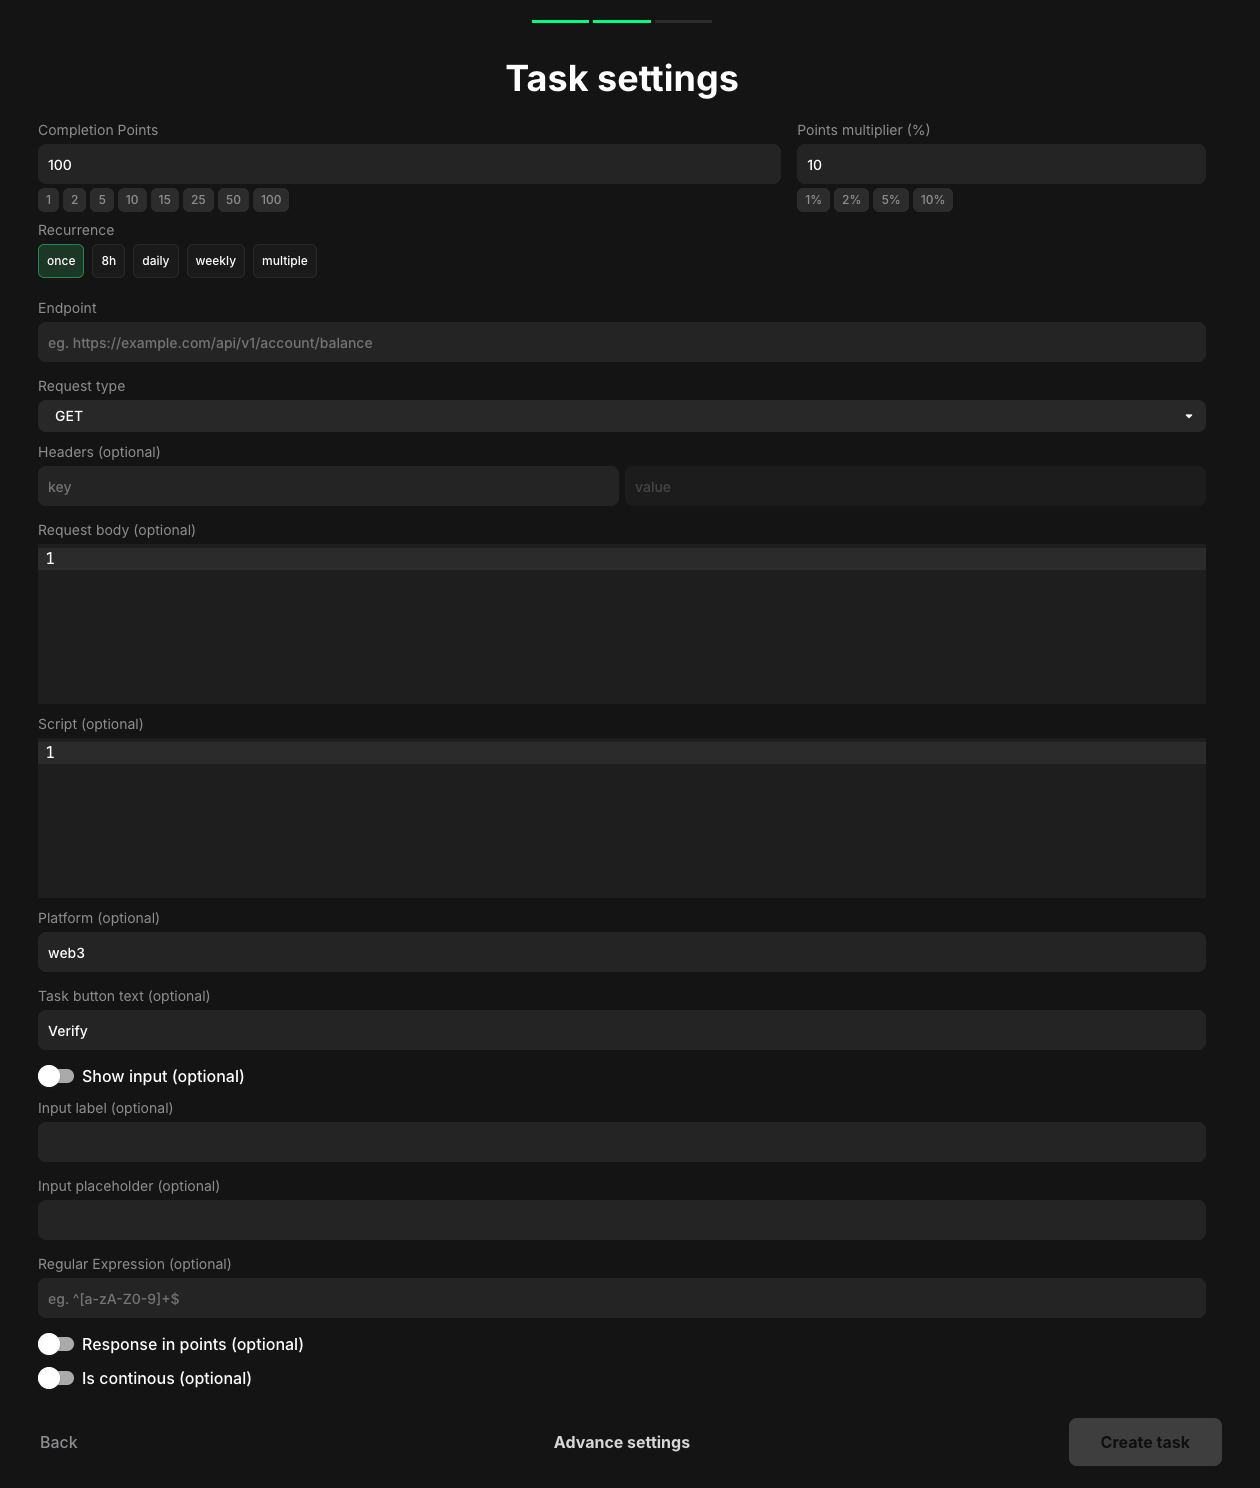
Task settings
- Once - can only be completed one time per user
- 8h - available once every eight hours
- Daily - available once every 24 hours
- Weekly - available once every 7 days
- Multiple - stays open and can be completed as many times as needed, one after another, without any waiting time
- Provide the correct and complete URL, including any necessary paths or parameters
- Example placeholder: “eg.
https://example.com/api/v1/account/balance” - This ensures the request reaches the intended destination on your server
Using Claimr tags in the endpoint field
Claimr provides tags that can be used to dynamically insert values into the endpoint URL. They are useful when you need to include user-specific or campaign-related information in the request. Available tags:{{address}}- the user’s account identifier{{cs_address}}- the checksum address of the user’s wallet{{week_start_iso}}- the start of the week in ISO 8601 format (YYYY-MM-DD){{week_end_iso}}- the end of the week in ISO 8601 format{{day_start_iso}}- the start of the day in ISO 8601 format{{day_end_iso}}- the end of the day in ISO 8601 format{{quest_id}}- the unique ID of the current quest{{task_id}}- the unique ID of the current task{{input}}- the value entered by the user in the task’s input field (if enabled)
- GET - Retrieve information without modifying server data (e.g., user details, account balances, campaign statistics)
- POST - Send data to create or update a resource (e.g., submitting user information, registering accounts, processing payments)
- PUT - Update existing data on your API (e.g., modifying user profiles, changing settings, replacing data)
- Field format: key (left column) and value (right column)
- Use headers to transmit sensitive information like authentication tokens or API keys
- Verify the legitimacy of requests and prevent unauthorized access to your API
- Specify content format (e.g., JSON, XML), caching rules, or other API requirements
- The format depends on the Request type selected
- POST and PUT requests: Use JSON to structure the data
- GET requests: Request bodies are generally not used
- Claimr tags can also be used in the request body field
- Useful when the response is complex or requires custom logic to determine task completion or calculate rewards
- The script has access to a
responseobject containing the data returned by your API - Use JavaScript code to extract values, perform calculations, or apply conditions
- Boolean (true or false): Indicates whether the task is completed
- Number: Specifies the number of points to award for completing the task
- For external APIs: Use a simple identifier (e.g., “Telegram”)
- For Claimr token generation: Use the format
organization_id::platform_name- Example: “ExamplE1::my_platform”
- This helps Claimr correctly identify the user account and associate it with the task
- Leave blank when using Claimr’s built-in functionality with web3 as the platform
- Example: “Verify”
- Provides clearer instructions or context to the user
- If disabled, the task will not require any user input
- Helps users understand what kind of information they need to enter
- Only appears if “Show input” is enabled
- Provides further guidance or examples to the user
- Only appears if “Show input” is enabled
- Ensures that users provide data in a specific format or pattern
- Example placeholder: “eg.
^[a-zA-Z0-9_]+$” - Example for Twitter links: Validate that input matches the expected format of a Twitter URL
Return value handling
HTTP 200 Status Code: Indicates that the request was successfully received, understood, and accepted by the server. Exceptions (0, “0”, false): Even if the status code is 200, the actual content of the response is checked. If the response body is 0, “0”, or false, it is treated as a failure or an invalid response despite the successful status code. Example use case: Your application might consider the request successful only if:- The server responds with a status code of 200
- The response body contains meaningful data (not 0, “0”, or false)
Testing your task
Claimr provides a built-in testing tool to help you verify that your HTTP request task is configured correctly and functions as expected.1
Open the Test section
Within the task settings, find the Test section.
2
Enter test data
- Test address: Enter a test address or value for the HTTP request
- Test input value: If your task requires user input, enter a test value
3
Run the script
Click Run script to simulate task execution.
4
View the response
View the response from your API to verify correct configuration.
Use cases
Gift code verification: Ask users to enter a gift code and use your API to verify its validity. Link validation: Ask users to submit a link to their social media profile or specific webpage and use regex to ensure the link is in the correct format. KYC verification: Check if a user has completed KYC verification on your platform using their wallet address.Save and configure
Back: Click to return to the previous screen without saving Advance settings: Click to configure additional task settings like dependencies, completion pop-ups, and metadata Create task: Click to save your task and add it to your questExample: KYC verification task
Scenario: Users need to complete KYC verification on your platform.1
KYC on your platform
Users verify their identity through their wallet.
2
Set up your API endpoint
Your platform has an endpoint to check KYC status by wallet address.
3
Configure the HTTP Request task
- Endpoint:
https://your-platform.com/api/kyc/{{address}} - Request Type: GET
- Headers: Include authentication token for API access
- Dynamic address: The
{{address}}tag inserts the user’s wallet address
- When a user attempts the task, Claimr sends a GET request with their wallet address
- Your API checks its database and returns KYC verification status
- Claimr checks the response: if KYC is passed, the task is marked complete