
Before you start
Make sure you have:- A quest created within your campaign
- Knowledge of which blockchain network(s) your users are active on
- A minimum balance threshold determined
Create the task
Follow the steps in Web3 tasks to navigate to the task creation screen, select Web3 from the Groups section, and choose Wallet Balance.Task settings
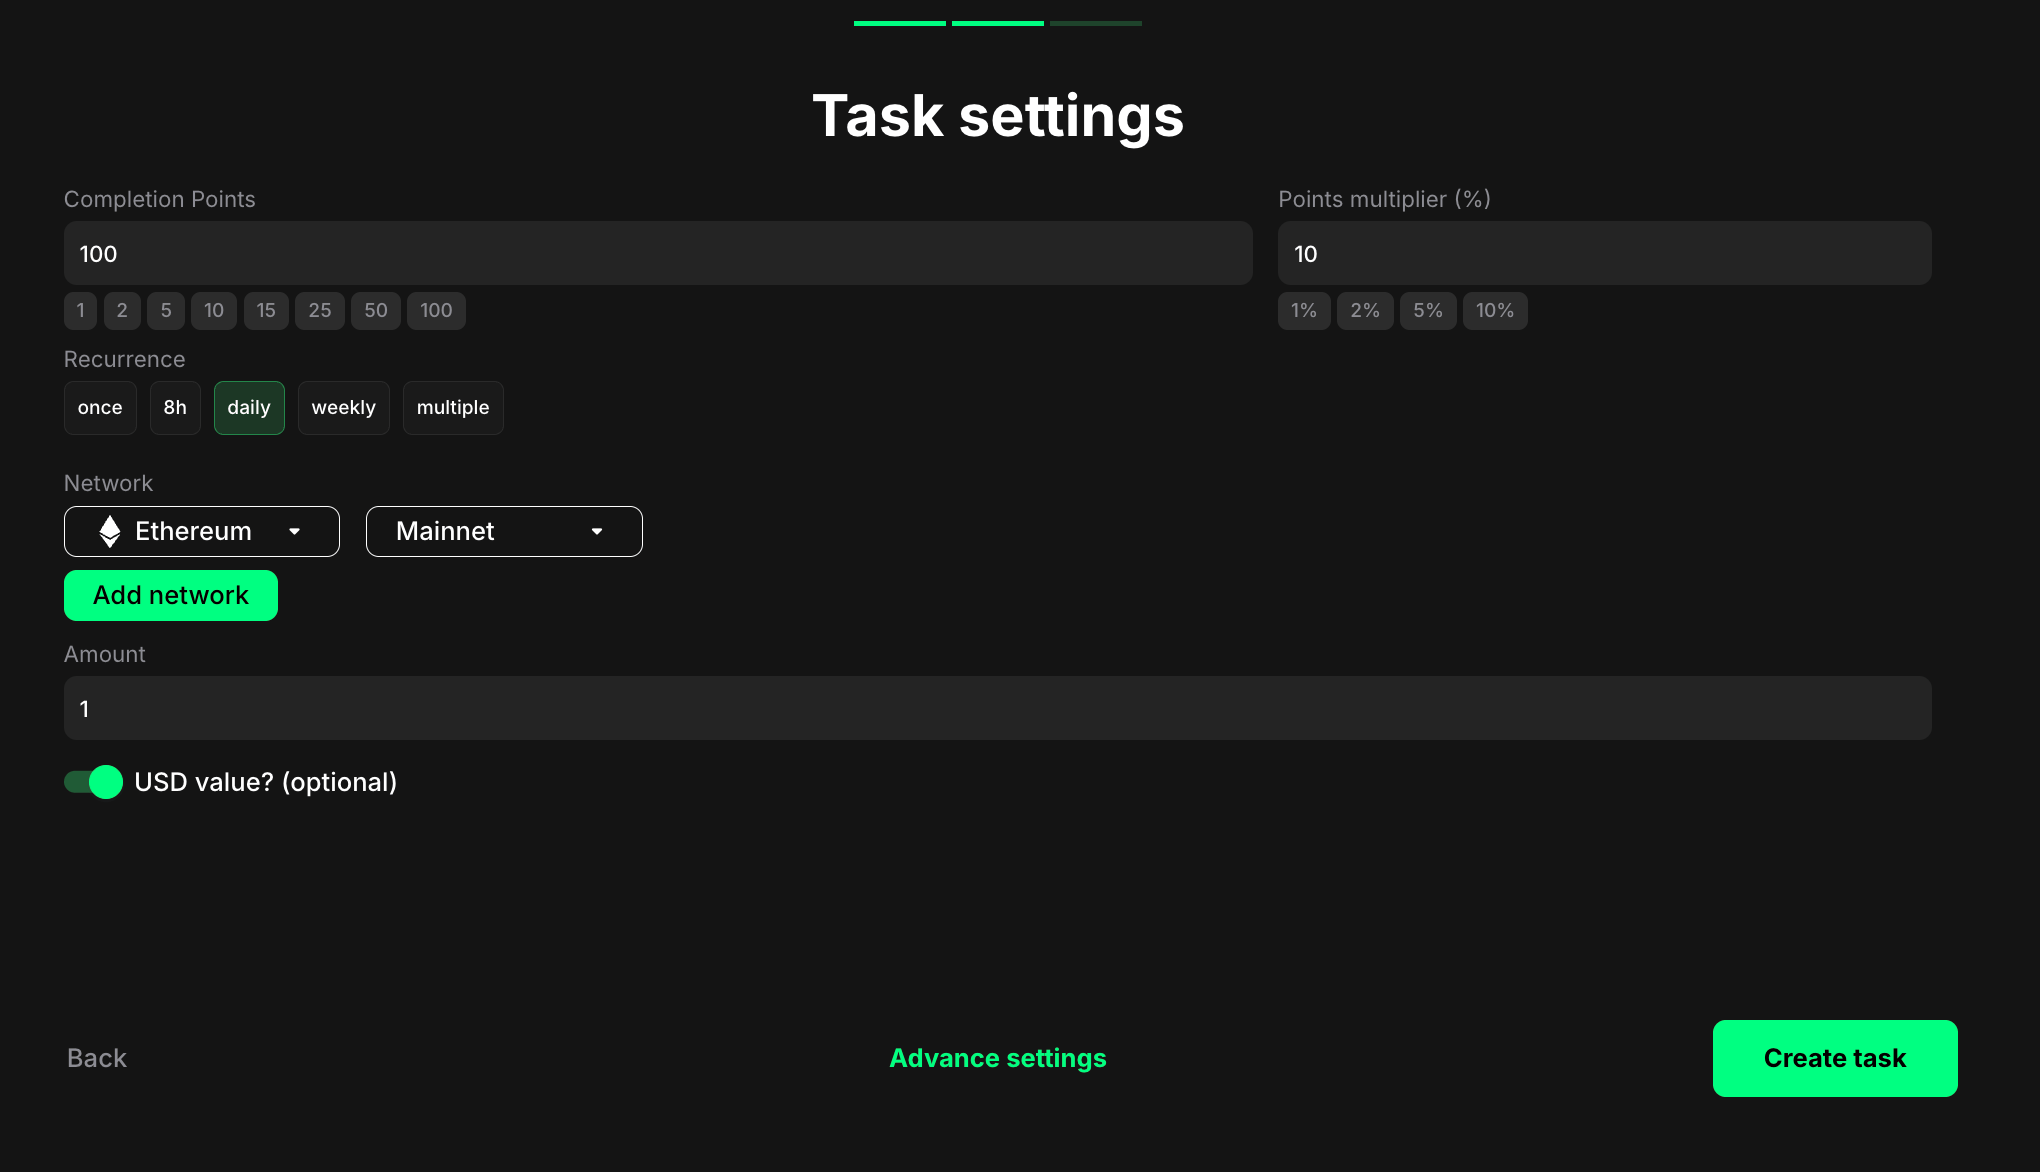
- Once - can only be completed one time per user
- 8h - available once every eight hours
- Daily - available once every 24 hours
- Weekly - available once every 7 days
- Multiple - stays open and can be completed as many times as needed, one after another, without any waiting time
- Click the first dropdown to choose a network (e.g., Ethereum)
- Click the second dropdown to select Mainnet or Testnet
- Click Add network to check balances across multiple networks
- Users must meet the minimum amount across all selected networks combined
- Example: Entering “1” would require users to have at least 1 ETH in their wallet on the chosen network(s). The balance is cumulative across all networks you’ve added.
Helpful tips
- Provide clear instructions on how users can check their wallet balance on the specified blockchain network
- Be transparent about why you’re checking wallet balances and how it relates to your campaign goals
- Consider setting different minimum amounts for different networks based on typical gas fees and activity